Best Value Off-Road Jack Options Compared: Hi-Lift, Bottle, and Hydraulic
Your stock scissor jack is not a trail jack. It was designed to change a tire in a parking lot on level pavement, and it will fail you in every situation that actually matters on the trail. If you’ve ever sunk a jack into soft dirt, watched it tip sideways on a slope, or just looked at the clearance gap under your rig and realized your factory hardware wasn’t going to reach, you already know this.
The good news: solid off-road jacks are not expensive. The bad news: there are several very different types, and the “best” one depends on what you’re driving, where you’re going, and what kind of trouble you’re expecting to find. This guide breaks down every major off-road jack type, gives you an honest comparison, and points you toward the best value picks at each tier.
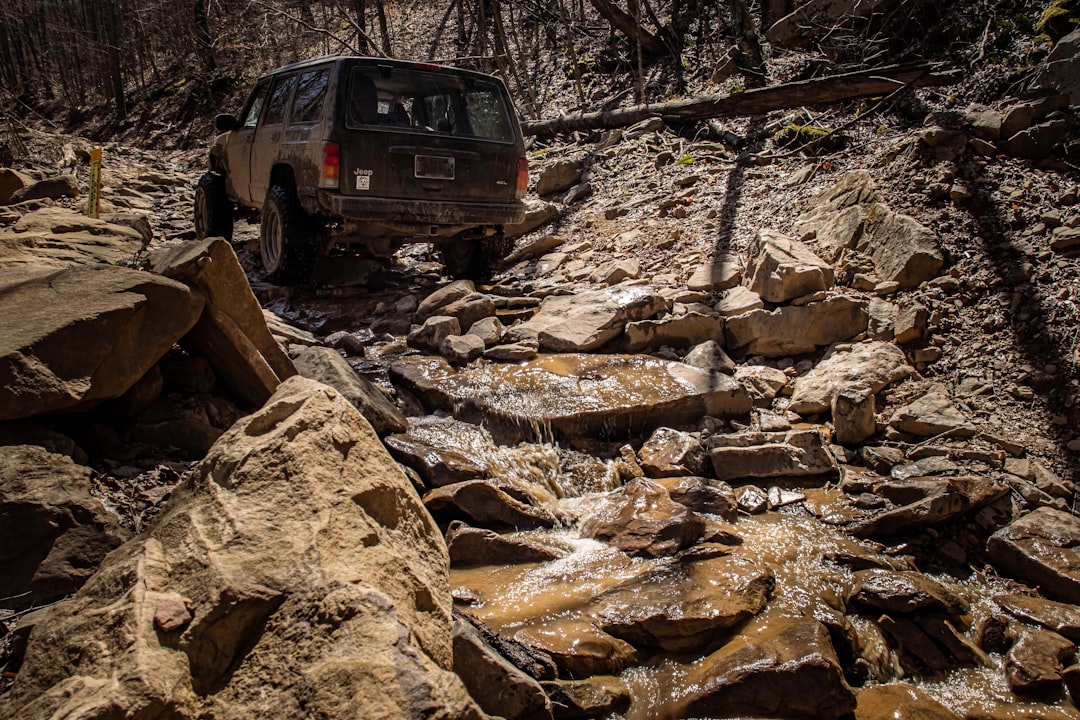
Photo by Brice Cooper on Unsplash
Safety notice: Jacking up a vehicle on uneven terrain carries real risk of vehicle roll or collapse. Always use jack stands or cribbing blocks before getting under a vehicle, chock the wheels on the opposite end, and never jack on a slope without a solid base plate. If you are unsure, do not proceed without help. Carry a first aid kit on every trip.
Why Your Stock Jack Won’t Cut It on the Trail
The jack that came with your truck or SUV is a liability in off-road situations for several reasons. First, the footprint is tiny, which means it sinks immediately into mud, sand, or soft forest floor. Second, the lifting height is usually too short to clear lifted suspension or large tires. Third, the mechanism is hand-cranked and slow, which matters when you’re fighting the clock against a rising tide, falling darkness, or a worsening weather window.
Stock jacks are also typically rated for the kerb weight of the vehicle in ideal conditions. Add gear, a roof rack, a full water system, and a spare tire mounted on the rear, and you’re pushing that rating in ways the manufacturer didn’t intend. In our experience with loaded builds, the stock jack becomes a single-use liability rather than a real recovery tool.
There’s also the issue of attachment points. Many off-road vehicles, especially older trucks and lifted rigs, don’t have frame contact points that are easily accessible with a standard scissor or pantograph jack. The hi-lift jack’s rail slot changes this entirely.
The bottom line: budget $50-$150 for a dedicated trail jack before your first multi-day trip. It’s one of the cheapest pieces of insurance you can carry, and unlike most gear it pulls double duty as a winch, spreader, and clamp in the right configuration. If you haven’t already nailed down your full recovery kit, start with our overland recovery gear guide before going deep on jacks specifically.
The Main Types of Off-Road Jacks Compared
There are four categories worth knowing: hi-lift (farm) jacks, bottle jacks, hydraulic floor jacks, and inflatable bag jacks. Each has a different profile of strengths, weaknesses, and ideal use cases. Here’s how they stack up:
| Jack Type | Typical Price | Lift Height | Best Surface | Weight | Key Limitation |
|---|---|---|---|---|---|
| Hi-Lift (Farm Jack) | $60-$140 | Up to 60” | Any (with base plate) | 28-30 lbs | Unstable at height, needs attachment point |
| Bottle Jack (hydraulic) | $25-$80 | 7”-20” | Hard, level surface | 5-14 lbs | Short reach, needs solid flat contact |
| Hydraulic Floor Jack | $80-$200 | 14”-22” | Hard, reasonably level | 30-60 lbs | Heavy, low clearance models won’t fit under lifted trucks |
| Inflatable Bag Jack | $80-$200 | 0”-24” | Soft or rough terrain | 3-6 lbs | Requires exhaust air source, slow |
The practical takeaway: For most budget overlanders running a truck or SUV with moderate lift, a hi-lift jack covers the most situations. For rock crawlers and low-clearance rigs with frame-level attachment points, a heavy-duty bottle jack is often lighter and more stable. Inflatable bag jacks are a niche tool, most useful for sand and mud where hydraulic options sink.
We’ve tested both bottle jacks and hi-lift jacks in the field and find that the hi-lift wins on versatility but demands more respect and technique. A bottle jack is faster and more stable when the geometry works.
Hi-Lift Jacks: The Off-Road Workhorse for Budget Builds
The hi-lift jack has been a trail staple for decades because it does things no other jack can. It lifts extremely high, attaches to bumpers, sliders, and recovery boards rather than requiring a flat frame pad, and can be rigged as a makeshift winch, spreader, or clamp with the right accessories. The Hi-Lift Jack HL484 is the brand name most people think of, and for good reason: the build quality is consistent, the replacement parts are widely available, and the operating mechanism is well understood.
That said, the hi-lift is not plug-and-play. You need solid attachment points on your vehicle. A stock plastic bumper will not work. Many overlanders add a recovery point adapter that bolts to the receiver hitch, which solves the attachment problem cleanly and cheaply. You also need a base plate (sometimes called a “hi-lift foot”) to prevent the base from sinking on soft ground. A $10 piece of 3/4” plywood works in a pinch.
The other thing to know: hi-lift jacks are dangerous when used incorrectly. The locking mechanism requires you to hold load weight while switching directions, and a dropped or runaway jack has caused serious injuries. The correct technique involves keeping your body clear of the potential fall zone, maintaining control of the handle at all times, and never working under a vehicle supported only by a hi-lift.
For the budget buyer, the Hi-Lift Jack 48” Stealth Jack SE-485 is a strong pick. The Stealth version has a cast iron climb (the main rail mechanism) rather than standard gray iron, which is more forgiving of rust and longer in service life. At 48 inches of lift height, it handles most truck and SUV lifts without running out of travel.
What to look for when buying a hi-lift:
- Minimum 48” lift height for lifted trucks; 36” works for stock or mildly lifted
- Cast iron or forged steel climb mechanism (not pot metal knockoffs)
- Rated capacity at or above your vehicle’s loaded weight
- Compatible brand accessories (base plates, off-road adapters)
Be wary of cheap no-name hi-lift clones on Amazon. Some have failed catastrophically under load. If you are going to scrimp somewhere, don’t scrimp on the jack holding your rig off the ground.
Bottle Jacks and Hydraulic Options for Trail Use
Bottle jacks are the other budget-friendly off-road option, and they’re genuinely excellent in the right context. A 12-ton hydraulic bottle jack weighs under 10 lbs, costs $25-$40, and will lift more than almost any vehicle you’re likely to drive. The BIG RED Torin Hydraulic Bottle Jack, 12 Ton is a well-reviewed example that hits the sweet spot of capacity, size, and price.
The limitation is geometry. Bottle jacks need a flat, hard surface to sit on, and they need a flat, accessible frame or axle contact point directly above them. On soft ground, they sink. On uneven terrain, they tip. On heavily lifted trucks with 35”+ tires, the collapsed height of a standard bottle jack may not reach the frame without a riser block.
For rock crawling in particular, a long-travel bottle jack (sometimes called a “trail jack” or “off-road bottle jack”) with a saddle head is often the preferred tool. These are taller in collapsed position and specifically sized to reach the axle housing on lifted rigs.
The Torin BlackJack Hydraulic Floor Jack, 3 Ton is worth considering for overlanders who also use their vehicle as a daily driver and want a jack that works in both settings. The trade-off is weight (it’s heavier) and packability (it doesn’t store as neatly as a bottle jack). But for someone who wants one jack for everything, it covers more situations.
When a bottle jack makes more sense than a hi-lift:
- Your vehicle has solid, accessible frame contact points at the right height
- You mainly travel on rocky or hard-pack terrain (where the base won’t sink)
- You don’t have bumpers or sliders with hi-lift slots
- You want a lighter, more compact option
How to Use a Trail Jack Safely: Step-by-Step
Important: Never work under a vehicle supported only by a jack. Always use secondary support (jack stands, recovery boards stacked flat, or cribbing blocks) before placing any part of your body under the raised vehicle.
The steps below apply to hi-lift jacks in a trail recovery context. Bottle jack procedures differ slightly but the same safety principles apply.
Before you jack:
- Turn off the engine and engage the parking brake.
- Chock the wheels on the opposite end of the vehicle (front wheels if jacking the rear, and vice versa).
- Assess the ground under the jack base. If it’s soft, place your base plate or a solid board before doing anything else.
- Identify your lift point: bumper slot, rocker slider, or frame contact point. Never lift on plastic body panels or sheet metal.
- Check that nothing is underneath the vehicle in the fall zone.
Jacking up:
- Position the hi-lift base directly under your lift point.
- Engage the reversing latch in the “up” position.
- Operate the handle in smooth, full strokes. Keep your free hand away from the pinch points.
- Lift only as high as you need. The higher you go, the less stable the jack becomes.
- Once at working height, place secondary support before doing anything else.
Lowering:
- Remove secondary support.
- Hold the handle firmly with both hands.
- Shift the reversing latch to the “down” position while maintaining grip on the handle. This is where most accidents happen. The handle will snap if you let go.
- Lower in controlled strokes.
In our experience, the most common errors on the trail are skipping the base plate and trying to work too quickly when tired or frustrated. Both are very controllable with a checklist mindset.
Common Mistakes That Get People Stuck (or Hurt)
Off-road jacking has a short list of mistakes that come up repeatedly, and most of them are avoidable with a small amount of preparation.
Not having a base plate. The hi-lift’s small base footprint will sink immediately in mud, sand, pine needles, or loose rock. A purpose-built hi-lift base plate costs $20-$30. A scrap of 3/4” plywood cut to 12”x12” is free. Either is better than nothing, and neither weighs much. This is probably the single most common oversight on first-time overlanding rigs.
Wrong lift point selection. Pinch seams, plastic trim, and unibody sheet metal are not lift points. On a lifted truck with aftermarket bumpers and sliders, this is easier to navigate. On a stock crossover or stock-bumper truck, finding a solid hi-lift slot requires some research into your specific vehicle’s frame geometry before you head out. Don’t figure this out for the first time in the dark in the rain.
Relying on one jack for everything. Many experienced overlanders carry both a hi-lift and a bottle jack. The hi-lift handles high lifts and soft terrain recovery; the bottle jack handles precise frame work and tire changes on harder ground. The combined weight is under 40 lbs and they store easily in most truck beds.
Skipping technique practice. If you’ve never operated a hi-lift jack, practice at home before you need it on a trail. The reversing latch, the base plate setup, and the lift point identification are all skills that should be muscle memory, not something you’re reading about for the first time three miles from the nearest cell signal.
Buying a cheap clone. This cannot be overstated. The hi-lift knockoffs on the market vary widely in casting quality, and some have failed during lifts. The brand-name Hi-Lift Jack, Smittybilt, and Torin products have track records. Unknown-brand options at very low price points are a gamble that isn’t worth taking on a safety-critical piece of gear.
Frequently Asked Questions
Do I need a hi-lift jack if I have a winch?
A winch and a jack are complementary tools, not substitutes. A winch pulls your vehicle horizontally; a jack lifts it vertically. There are situations where you need both, and there are situations where only one works. A common scenario: you’re high-centered with a wheel hanging in the air, and your winch can’t help because you have no anchor. A hi-lift can lift you high enough to stack rocks or use a traction board under the wheel, then you drive out. Carry both if you’re doing serious off-road travel.
How much capacity do I need in a trail jack?
Aim for at least 1.5x your vehicle’s loaded curb weight. For a mid-size truck like a Toyota Tacoma or Ford Ranger loaded with gear, that’s typically 6,000-8,000 lbs. A 3-ton (6,000 lb) rated hi-lift is a minimum; most experienced overlanders prefer the 3.5-ton version. Note that hi-lift jacks are typically rated at full collapsed height and lose rated capacity as they extend, so err toward more capacity, not less.
What’s the best jack for a Jeep JK or JL Wrangler?
Jeep Wranglers are well served by hi-lift jacks because they typically have aftermarket bumpers with hi-lift slots and solid rock sliders. A 48” hi-lift covers almost all configurations. If you’re running stock bumpers, add a receiver hitch adapter to give the hi-lift something solid to grab onto.
Can I use a floor jack on the trail?
Standard hydraulic floor jacks are not designed for off-road use and have two main problems: they’re heavy and they have very low ground clearance in collapsed position, which can prevent them from fitting under lifted trucks. A floor jack designed for shop use is a reasonable solution for base camp work on hard-packed ground, but it’s not what you want to rely on mid-trail.
How do I store a hi-lift jack on my build?
Common mounting locations include: behind the rear seat (inside the cab), across the top of a bed rack, on the outside of a rooftop tent rack, or on a purpose-built side mount on the trailer tongue or fender flare. The key requirements are secure mounting (so it doesn’t rattle or shift), some weather protection from prolonged exposure, and access without having to unpack the rest of your gear to reach it.
Conclusion: Pick Your Jack Before You Need It
The right trail jack for most budget builds is a 48” hi-lift with a base plate and at least one solid attachment point on the vehicle. It costs under $100, weighs about 28 lbs, and covers the widest range of trail scenarios. Add a dedicated bottle jack if your terrain tends toward rocky hard-pack or if you want a backup for precise frame work.
Don’t wait until your first breakdown to sort this out. Test your jack at home, identify your lift points, and add it to your pre-trip checklist. The ten minutes of prep work is worth far more than the thirty minutes of figuring it out on the trail.
What you carry matters, but how you use it matters more. A quality jack with proper technique is far more valuable than a premium jack that you’ve never practiced with. Run through the setup at home once, confirm your lift points, and you’ll handle the real thing with confidence when it counts.
Bookmark this guide for your next build planning session, or share it with someone who’s just starting out.
| Related reading: Overland Recovery Gear: What to Carry and Why | Overland First Aid Kit: What to Carry and Why |