Budget Overland Air Compressor Guide: On-Board vs. Portable
If you’ve aired down for a sandy wash or a rocky two-track, you already know the problem: getting your tires back to highway pressure is slow, sweaty work without the right compressor. A decent air compressor is one of the highest-utility items on any overlander’s gear list, and it’s one of the first upgrades that actually changes how you drive trails.
The budget question isn’t just “which compressor should I buy?” It’s “on-board or portable?” The two categories look similar on paper but serve different rigs, different trip styles, and different budgets. This guide breaks down both options, explains the specs that matter, and helps you decide where to put your money.
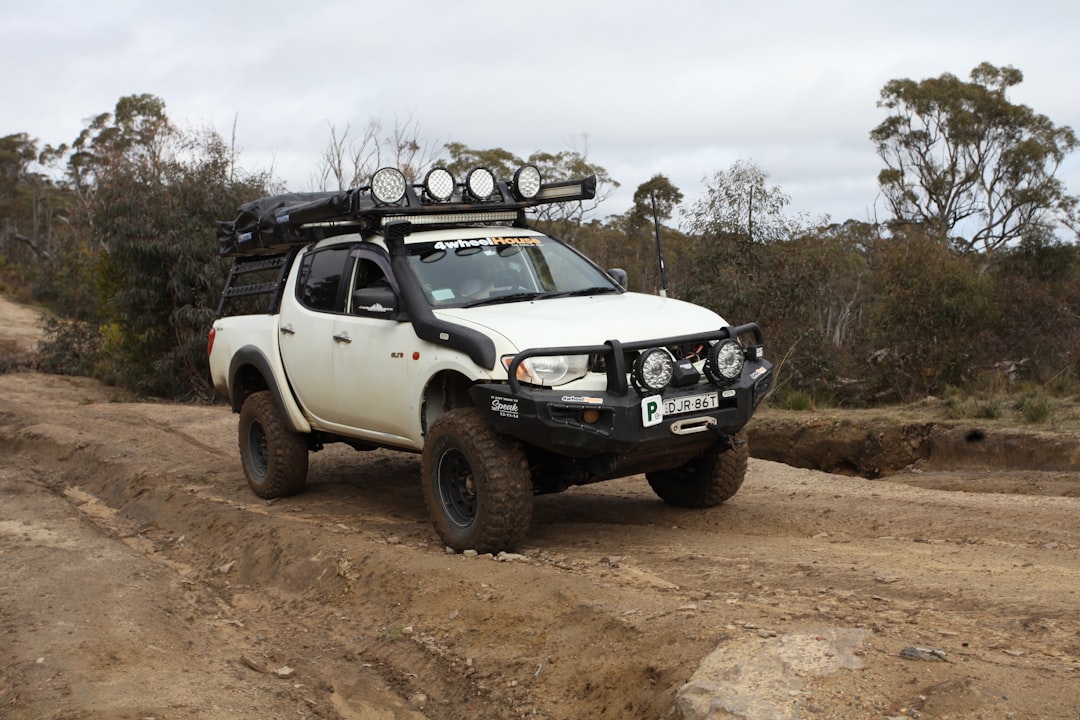
Photo by 4Wheelhouse on Unsplash
Why Every Overland Rig Needs a Compressor
Airing down is not optional for serious off-road driving. Dropping tire pressure from highway spec (35-40 PSI) to trail spec (18-25 PSI for most trucks, lower on sand) increases footprint, improves traction, and reduces the chance of a sidewall puncture on sharp rock. The problem is that you need to air back up when you return to pavement, and driving on aired-down tires at highway speeds destroys them fast.
A hand pump doesn’t cut it. A gas station might be 40 miles away. And even if you reach one, a coin-operated tire inflator takes 20 minutes to refill four LT tires. On a multi-day trip, you might air down and back up three or four times. A compressor pays for itself on the first trip.
We’ve watched people attempt to air up four 33-inch tires with a $20 cigarette lighter inflator. It works, eventually, but the compressor overheats twice and the whole process takes nearly an hour. The right tool here is worth the investment.
On-Board vs. Portable Compressors: What Is the Real Difference?
Portable compressors are standalone units you store in your truck and connect to the battery via clamps or a 12V outlet when needed. Most weigh between two and fifteen pounds. They’re self-contained, transferable between vehicles, and the cheapest entry point. The downside is that top-tier portable units still inflate more slowly than a dedicated on-board setup, and you have to dig them out and connect them at the trailhead.
On-board compressors are permanently mounted under the hood or in the engine bay, wired directly to your electrical system (usually to a secondary battery or isolator relay). They typically include a tank, a pressure switch, and quick-connect air lines routed to accessible ports on your rig. You flip a switch and air comes out of a hose already in your bumper or on your rocker panel. They’re faster, more convenient, and purpose-built for heavy use, but they require installation time and a solid electrical foundation.
The right choice depends on three things: how often you wheel, whether you’re building a dedicated rig or using a daily driver, and how much installation effort you’re willing to put in.
| Portable | On-Board | |
|---|---|---|
| Upfront cost | $40-$300 | $150-$600+ (installed) |
| Installation required | No | Yes |
| Speed (typical 33” tire) | 3-8 min/tire | 1-3 min/tire |
| Transferable between vehicles | Yes | No |
| Best for | Occasional wheelers, budget builds | Dedicated rigs, frequent use |
| Power source | 12V clamps or outlet | Direct battery wiring |
The Specs That Actually Matter for Budget Overlanding Air Compressors
Walk into any forum discussion about air compressors and you’ll see three numbers thrown around: CFM, PSI, and duty cycle. Here’s what each means for real-world trail use.
CFM (Cubic Feet per Minute)
CFM is how fast the compressor moves air. Higher CFM means faster inflation. For airing up 33-inch LT tires from 18 PSI to 35 PSI, you want at least 1.5 CFM; 2.5 CFM or more makes a noticeable difference. On-board units typically run 2-4 CFM. Budget portables are usually 1.0-2.0 CFM.
PSI (Max Pressure)
Most overlanding compressors are rated at 150-160 PSI. For tire inflation, 100 PSI is plenty, so the max PSI rating doesn’t really differentiate products at this use case. Where PSI matters more is if you’re using the compressor for on-board air lockers (like ARB lockers), which typically need a continuous supply at 100+ PSI.
Duty Cycle
This is the most underappreciated spec in budget compressor shopping. Duty cycle tells you how long the compressor can run continuously before it needs to cool down. A compressor with a 25% duty cycle can only run for 15 minutes out of every hour, or about 3-4 minutes of continuous run time. That’s fine for a quick tire inflation but insufficient for running air tools or lockers for extended periods.
Budget units often have 25-33% duty cycles. Quality units (VIAIR, ARB) run 50-100%. If you’re buying a dedicated on-board setup, prioritize a higher duty cycle. For portable use limited to tire inflation, a 25% duty cycle is acceptable.
Amperage Draw
On-board compressors can draw 20-40 amps. This is why pairing one with a budget dual battery setup matters, as running a high-draw compressor off a single starting battery at idle can stress your electrical system.
Best Budget Portable 12V Air Compressors
The portable category has a wide range of quality at similar price points. Here’s how three well-regarded options compare.
VIAIR 88P
The VIAIR 88P is the entry-level unit from one of the most respected names in overlanding compressors. It clips directly to your battery terminals, runs at 1.47 CFM, and handles tires up to 33 inches reliably. The 25% duty cycle means you’ll take a break between tires, but for casual weekend wheelers it’s a solid performer. VIAIR backs their products with consistent OEM relationships, and parts availability is strong.
VIAIR 88P Portable Air Compressor
VIAIR 400P
Stepping up within the VIAIR lineup, the 400P runs at 2.30 CFM with a 33% duty cycle. It handles tires up to 35 inches and is rated for larger passenger tires and LT sizes. The automatic shutoff at a set PSI is a practical feature when you’re airing up multiple tires and want to walk away. This is a better choice if you run tires larger than 33 inches or do more than occasional trail days.
VIAIR 400P Automatic Portable Compressor
SmittyBilt 2781
The SmittyBilt 2781 is the outlier here, with a 5.65 CFM rating at a price point that undercuts comparable units significantly. It fills tires fast and includes a storage bag with basic accessories. The tradeoff is a shorter duty cycle and less robust construction than VIAIR products. In our experience with the SmittyBilt, it works well for the first year or two but doesn’t hold up as well under hard regular use. For occasional use or a secondary vehicle, it’s a good value.
SmittyBilt 2781 5.65 CFM Air Compressor
Building an On-Board Budget Air Compressor Setup
A true on-board system consists of a compressor, a tank, a pressure switch, and distribution plumbing. You don’t need all four to get started. Here’s how to tier the investment.
Tier 1: Compressor Only, No Tank (~$150-250)
Mount a mid-range compressor (VIAIR 400C, Smittybilt 2781 mounted permanently) under the hood and wire it with a relay to a dash switch. Add a quick-connect fitting to the output line and run it to an accessible point. This gives you convenient access without pulling anything from storage. Inflation speed is the same as a portable, but setup time at the trailhead drops to zero.
A safety note on electrical installation: whenever wiring a high-draw compressor directly to your battery, use an appropriately rated fuse at the battery terminal (typically 30-40A). Unfused wiring through the firewall is a fire risk. If you’re not confident in automotive wiring, have the installation reviewed by someone who is.
Tier 2: Compressor with Tank (~$250-500)
Adding a one-gallon or two-gallon air tank to the system lets the compressor build pressure in reserve, and the tank handles initial tire inflation quickly before the compressor catches up. A pressure switch cycles the compressor on and off to maintain tank pressure. This setup also supports ARB air lockers, small air tools, and tire inflators simultaneously.
VIAIR’s 400C is a common budget on-board choice. ARB is the gold-standard but starts at $500+ for the compressor alone.
Tier 3: Full Integrated System (ARB, Warn, OBA kits ~$500+)
At this level you’re looking at higher duty cycles (100%), larger tanks, and quick-connect points plumbed around the vehicle. This is the right choice for serious expedition builds. It’s outside the budget overlanding range for most, but worth knowing what you’re working toward.
For more on powering an on-board system, see our guide on budget dual battery setups for overlanding.
VIAIR publishes detailed duty cycle and current draw specs on their website at viair.com, which is worth reviewing before choosing a model.
Common Mistakes When Buying a Budget Air Compressor
Buying based on CFM alone. A high CFM rating with a low duty cycle means the compressor shuts down every three tires. Check duty cycle before anything else.
Using a cigarette lighter socket for high-draw compressors. Most factory 12V outlets are fused at 10-15 amps. Any compressor drawing more than that will pop the fuse or, worse, damage the socket. Battery clamp connections are better for any compressor rated above 20 amps.
Skipping a pressure gauge. Cheap compressors often include cheap analog gauges that read inaccurately. A digital tire inflator or a separate quality gauge is worth $15-20 for consistent results.
Not budgeting for hose length. A two-foot output hose means repositioning your vehicle between tires. Budget a few dollars for a longer reinforced hose (or a set of extensions) so you can air up all four tires from one spot.
Assuming all on-board setups are plug-and-play. Under-hood compressor kits from off-brand suppliers often don’t include mounting hardware, proper fusing, or adequate hose runs. Budget installation time and proper hardware into the total cost.
Frequently Asked Questions
What PSI should I air down to for trail driving?
It depends on tire size, load, and terrain. A common starting point is 20-25 PSI for rocky terrain on 33-35 inch tires, and 15-18 PSI on sand. Lower pressure means more sidewall flex and better grip, but also more risk of a bead unseating on an aggressive rim. Start conservative and experiment on mild trails before dropping low on technical terrain.
Can I run air lockers from a budget portable compressor?
Most air lockers (ARB, OX) require a continuous air supply at 100+ PSI. A portable compressor can technically supply this, but most budget portables aren’t designed for continuous duty and will overheat. VIAIR recommends dedicated on-board units for locker applications. If you plan to run lockers, build the on-board system first.
How long does it take to air up four tires from trail pressure?
With a budget portable at 1.5 CFM, expect 5-8 minutes per LT tire from 20 PSI to 35 PSI. Four tires is 20-30 minutes with required cool-down. A quality on-board unit at 3+ CFM with a tank cuts that to 10-15 minutes total. The time difference adds up fast on multi-day trips with multiple air-down/air-up cycles.
What’s the minimum I should spend on a compressor for trail use?
Budget $80-120 for a portable unit that won’t fail on you in the backcountry. Units under $50 are usually underpowered and have poor duty cycles. The VIAIR 88P at around $80-90 is a reliable floor. Spending less often means buying twice.
Is an on-board system worth it on a daily driver?
For a vehicle you use on trail one or two weekends a month, probably not. The installation cost and permanent battery load add up quickly for occasional use. Stick with a quality portable and invest the installation money elsewhere. On-board makes more sense when you’re committed to a dedicated build.
What to Buy: A Quick Decision Guide
If you’re a weekend wheeler on a tight budget: buy the VIAIR 88P and a set of quality tire deflators. Done.
If you run bigger tires or go out more than once a month: step up to the VIAIR 400P or equivalent.
If you’re building a dedicated rig and want the convenience of on-board air: start with a Tier 1 mounted setup using the 400C, upgrade to a tank when the budget allows.
If you already have a secondary battery and want air lockers down the road: plan for the full Tier 2 setup from the start so you don’t redo the wiring twice.
If this guide saved you time, bookmark it for your next build session. Drop a comment below if you’ve found a budget compressor setup that works well for your rig.
Related reading: Budget Dual Battery Setup for Overlanding