Best Budget Portable Solar Panels for Overlanding
You are three days into a remote desert trek and the voltage on your house battery is starting to look grim. Your 12V fridge is cycling more often because of the heat, and your lighting setup is drawing more than you anticipated. You have two choices: start the truck and burn precious fuel just to idle the alternator, or deploy a solar array. For those of us building a rig on a real-world income, the flashy $1,000 flexible solar blankets seen on Instagram are out of the question. You need a solution that provides reliable amperage for under $300, and you need it to survive being bounced around in the back of a 4x4.
The market is currently flooded with generic panels that promise the world but deliver half their rated wattage. When you are building a budget overland truck for under $2,000, every dollar spent on power generation must result in actual amp-hours in your battery. Portable solar is the most effective way to extend your stay at camp without the noise of a generator or the mechanical wear of idling. We have tested the cheap stuff and the mid-range contenders to find the sweet spot where durability meets affordability.
Why Portable Solar Beats Fixed Panels for Budget Builds
When you are starting a budget build, the temptation is to bolt a couple of rigid 100W panels to your roof rack and call it a day. While fixed panels are “set it and forget it,” they are often the least efficient way to manage power on a budget. A fixed panel is only as good as the direction your truck is parked. If you want to keep your cab cool by parking under a sprawling oak tree, your fixed solar panels are now useless. Portable panels solve this problem by allowing you to park in the shade while placing your panels thirty feet away in the direct sun.
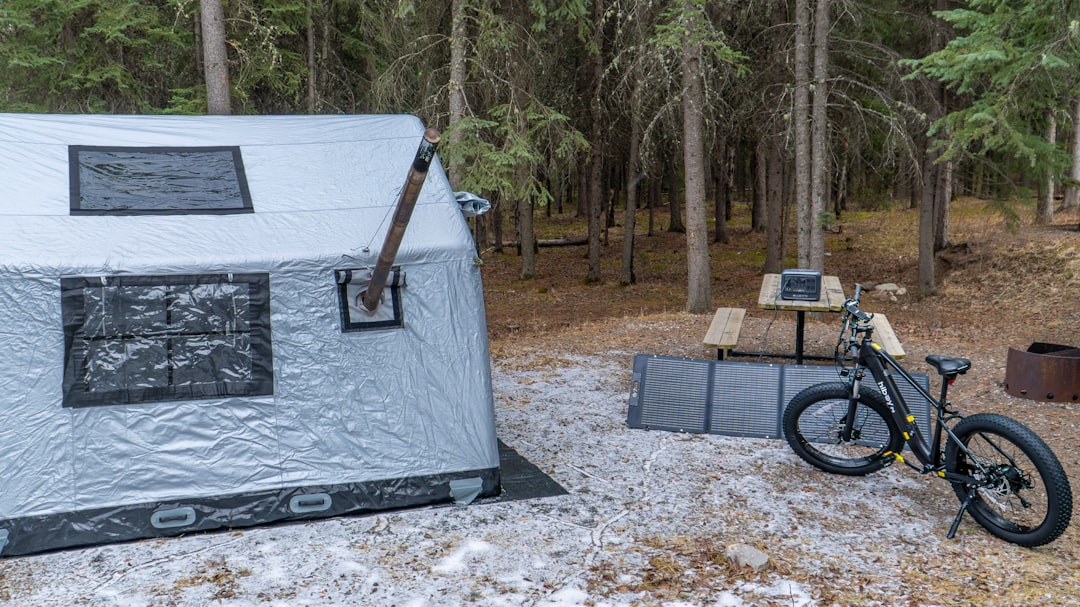
In our experience with portable solar on the trail, we found that a single 100W portable panel often outperforms two 100W fixed panels simply because you can tilt and aim the portable unit. Solar efficiency drops off a cliff the moment the sun is not hitting the cells at a perpendicular angle. With a budget-friendly portable kit, you can walk out of your tent, kick the legs out on the panel, and point it directly at the morning sun. By noon, you give it a quick turn to the south. By 4:00 PM, you face it west. This active management can result in 30 percent to 50 percent more total energy harvest over the course of a day compared to a flat-mounted roof panel.
Furthermore, fixed panels on a roof rack increase wind resistance and kill your fuel economy. On a budget build where every mile per gallon counts, adding a giant wind-catching slab to the roof is a mistake. Portable panels fold down and slide behind a seat or into a drawer system. They stay protected from low-hanging branches on tight trails and are not subject to the constant vibration of the vehicle’s roof, which can eventually lead to micro-cracks in the silicon cells. For the price of a single high-end fixed mounting system, you can often buy your entire budget solar array.
Top 3 Budget Solar Panels for Overlanding Evaluated
If you are looking for the best bang for your buck, you have to look at the big three in the portable space: Renogy, Goal Zero, and Jackery. Each of these brands offers a 100W solution that fits into a budget-conscious gear list while offering different trade-offs in terms of weight and durability.
The Renogy 100W Portable Solar Suitcase (https://www.amazon.com/dp/B0F6LHVQXQ?tag=budgetoverlander-20) is the gold standard for durability. Priced around $170 to $190, it features two 50W monocrystalline panels protected by a rugged aluminum frame and tempered glass. This is not a “soft” panel. It is a heavy-duty piece of equipment that can handle a literal hail storm. In our testing, the Renogy suitcase consistently delivers close to its rated output because the rigid glass construction handles heat dissipation better than plastic-laminated folding panels. The downside is the weight; at nearly 27 pounds, it is a beast to move around. However, for a budget build, the longevity of glass and aluminum usually outweighs the convenience of lightweight fabric.
The Goal Zero Nomad 100 Watt Portable Solar Panel (https://www.amazon.com/dp/B016UQNGFS?tag=budgetoverlander-20) represents the opposite end of the portable spectrum. Usually priced around $250 to $300, this is a folding, fabric-backed panel designed for those who prioritize space and weight. It folds down into a square that is easy to tuck into a packed rig. While it is more expensive than the Renogy suitcase, you are paying for the engineering that allows 100W of power to weigh only 10 pounds. It is worth noting that fabric panels like the Nomad use a laminate that can degrade faster in extreme heat compared to glass. If you are overlanding in a small SUV or a crossover where every pound matters, the Nomad is the premium budget choice.
The Jackery SolarSaga 100W Bifacial Portable Solar Panel (https://www.amazon.com/dp/B0D5CCY5Y2?tag=budgetoverlander-20) is the newcomer that brings a unique technology to the budget space for around $250. “Bifacial” means the panel can catch sunlight on both the front and the back. While the back side won’t produce 100W, it picks up reflected light from the ground, which is a game changer if you are camping on sand, light-colored dirt, or snow. The Jackery panels are incredibly easy to set up with integrated kickstands and a simple DC output that plugs directly into most portable power stations. It strikes a middle ground between the heavy Renogy suitcase and the ultra-light Goal Zero Nomad.
Understanding Solar Efficiency and Trail Realities
You will rarely see 100 watts of output from a 100W panel. This is the first thing every budget overlander needs to accept. Solar panels are rated under Standard Test Conditions (STC), which involve a laboratory setting with a specific light intensity and a cell temperature of 77 degrees Fahrenheit. In the real world, your panels will be sitting in 90-degree heat with a slight haze in the air. On a good day, expect 70W to 85W from a 100W panel.
Heat is the enemy of solar efficiency. As the silicon cells get hotter, their voltage drops. This is why the Renogy suitcase, with its air gap between the glass and the back of the panel, often performs better in the desert than a folding fabric panel that sits flat on the ground. When choosing a budget panel, look for “monocrystalline” cells. You might find “polycrystalline” panels for significantly cheaper (around $80 for 100W), but they are much less efficient and require a larger physical footprint to produce the same amount of power. For overlanding, the space savings of monocrystalline are always worth the extra $20 or $30.
Another factor is the type of coating used on the cells. Budget panels typically use either PET (polyethylene terephthalate) or ETFE (ethylene tetrafluoroethylene). PET is the cheaper, shiny plastic coating you see on the lowest-end panels. It is prone to delamination and “clouding” after a year or two of UV exposure. ETFE is a high-strength polymer that is more UV-stable and has a slightly textured surface that helps trap more light. If you can find an ETFE-coated panel within your budget, buy it. It will last twice as long as a PET panel in the harsh environments we encounter while overlanding.
Finally, consider the “bypass diodes.” If a single leaf falls on a cheap solar panel without good bypass diodes, the output of the entire panel can drop to zero. Higher-quality budget panels like the ones from Renogy or Jackery are wired in sections so that if one part of the panel is shaded, the rest of the panel continues to pump out power. This is critical when you are camping in wooded areas where total sun exposure is rare.
Integrating Solar into Your Vehicle Power System
Buying the panel is only half the battle; you have to get that power into your battery. If you are using a portable power station (like a Jackery or EcoFlow), the integration is usually “plug and play.” However, if you are running a budget dual battery setup for overlanding, you need a solar charge controller.
There are two main types of controllers: PWM (Pulse Width Modulation) and MPPT (Maximum Power Point Tracking). PWM controllers are the budget choice, often costing under $30. They are essentially a smart switch that connects the panel to the battery. They are reliable but inefficient, as they simply “clip” the excess voltage from the panel to match the battery voltage. MPPT controllers are more expensive (starting around $60 to $100) but can increase your energy harvest by up to 30 percent. They do this by converting the excess voltage into additional amperage. On a budget build, we recommend starting with a high-quality PWM controller if you are only running 100W of solar. If you plan to expand to 200W or more, the MPPT is a mandatory upgrade.
Wiring is another area where budget builds often fail. Most portable panels come with 10 or 15 feet of wire. If you want to park in the shade and put your panels in the sun, you might need a 30-foot extension. This is where “voltage drop” becomes a problem. If you use thin 16-gauge wire for a 30-foot run, you will lose a significant portion of your power to heat in the wire before it ever reaches your battery. We recommend using at least 10-gauge or 12-gauge “solar wire” with MC4 or Anderson Powerpole connectors. These connectors are weather-resistant and provide a solid, low-resistance connection that won’t vibrate loose on washboard roads.
When setting up your system, always connect the battery to the charge controller first, and then connect the solar panel. If you connect the panel first, the controller may not correctly identify the battery voltage (12V vs 24V) and could potentially damage your electronics. Most budget controllers have a simple LCD screen that shows you the current battery voltage and how many amps are coming in from the sun. Watching this display becomes a bit of a hobby for overlanders, as you learn to tweak the panel angle to squeeze out every last decimal point of an amp.
Durability and Trail Proofing Your Solar Gear
Overlanding is violent. Your gear is subjected to constant high-frequency vibrations, massive temperature swings, and the occasional dust storm. A solar panel that works in a backyard might fail on the second day of a trail run. When evaluating budget panels, look at the stress points. On folding panels, the most common failure point is the hinge or the wiring that passes between the folding segments.
The Renogy Suitcase handles this by using heavy-duty latches and a thick handle. The wiring is tucked inside the frame where it is protected from snags. If you go with a folding fabric panel like the Goal Zero or Jackery, pay attention to the grommets. High-quality panels have reinforced metal grommets at the corners. These are essential for “guying out” your panels in high winds. We have seen many “budget” panels flip over and crack because they weren’t staked down. A simple set of tent stakes and some paracord can save a $200 investment.
Another trail-proofing tip is to keep your panels clean. Dust is a major insulator. A thin layer of trail dust can cut your solar output by 20 percent. We carry a simple microfiber cloth and a spray bottle of water specifically for the solar panels. Avoid using harsh chemicals or abrasive sponges, as scratching the surface of the panel will permanently reduce its efficiency.
Security is also a concern. Portable panels are easy to steal because they are, by definition, portable. When we are away from camp, we often use a vinyl-coated security cable looped through the panel frame or grommets and locked to the vehicle’s frame or rock sliders. While any thief with a set of bolt cutters can get through this, it prevents the “crime of opportunity” from someone walking by your campsite while you are out on a hike.
Comparison Table: Best Budget Portable Solar Panels
| Product | Approx. Price | Wattage | Weight | Best Use Case |
|---|---|---|---|---|
| Renogy 100W Suitcase | $175 | 100W | 26.6 lbs | Max durability / High wind areas |
| Goal Zero Nomad 100 | $280 | 100W | 10.2 lbs | Space-constrained rigs / Weight sensitive |
| Jackery SolarSaga 100W | $250 | 100W | 10.3 lbs | Quick setup / High-albedo ground (sand/snow) |
Choosing between these three comes down to your vehicle’s storage capacity. If you have a full-size truck with a bed rack, the Renogy Suitcase is the clear winner because it is nearly indestructible. If you are overlanding in a Subaru or a Jeep Wrangler where every square inch of interior space is spoken for, the folding Goal Zero or Jackery panels are the better investment despite the slightly higher price tag.
For a technical deep dive into how solar cells are manufactured and the differences between monocrystalline and polycrystalline technology, you can refer to the EnergySage Solar Guide, which explains why the efficiency ratings matter for small-scale portable systems.
Common Mistakes and Troubleshooting
One of the most common mistakes we see on the trail is “partial shading.” People will set up their portable panel so that it is mostly in the sun, but the corner is shaded by a small bush or the spare tire of their rig. Because of how solar cells are wired in series, shading even 10 percent of the panel can sometimes drop the output by 50 percent or more. Always ensure the entire face of the panel has a clear line of sight to the sun. Even a thin power line running across the sun’s path can create a “shadow line” that kills your amperage.
Another mistake is overestimating what 100W can actually do. If you are running a large 12V fridge, charging two laptops, and running a diesel heater at night, a single 100W panel will not be enough to keep up. A 100W panel will typically provide between 30 and 50 amp-hours of charge per day, depending on your location and the season. A standard 12V fridge uses about 20 to 40 amp-hours per day. This means a 100W panel is just barely enough to keep a fridge running indefinitely. If you have more accessories, you need to look into a 200W setup or be prepared to run the vehicle every few days.
Troubleshooting often comes down to the connectors. If your controller shows 0.0 amps and the sun is shining, check your MC4 or DC connections. These connectors can sometimes feel like they are “clicked” in when they aren’t making full contact. Also, check the fuse. Every solar setup should have an inline fuse between the controller and the battery. If you accidentally reversed the polarity (connected positive to negative) even for a second, you likely blew that fuse. Always carry spare 10A, 15A, and 20A fuses in your trail kit.
Finally, do not forget about the “angle of incidence.” In the winter, the sun sits much lower in the sky. If you lay your panels flat on the ground in December, you might only get 20W of output. You must prop the panels up at a steep angle to catch those low-winter rays. Most budget panels like the Jackery have built-in kickstands, but for the Renogy Suitcase, you can adjust the legs to the perfect angle. This simple adjustment is the difference between a dead battery and a cold beer in the fridge.
FAQ
Can I leave my portable solar panels out in the rain?
Most high-quality budget solar panels are rated IP65 or IP67, meaning they are water-resistant and can handle a rainstorm. The Renogy Suitcase, with its glass and aluminum construction, is particularly hardy in wet weather. However, the charge controller is often the weak link. Many budget controllers are not waterproof. If your controller is mounted to the back of the panel (as it is on some Renogy models), you need to ensure it is protected or rated for outdoor use. For folding fabric panels like the Goal Zero, the fabric can soak up water and take a long time to dry, which can lead to mold if you fold it up wet. Always try to wipe your panels down and let them dry before long-term storage.
Do I need a solar controller if I am plugging into a portable power station?
No, you almost certainly do not. Almost all modern portable power stations (Jackery, EcoFlow, Bluetti, etc.) have a built-in MPPT charge controller. You can plug the “raw” DC output of the solar panel directly into the input port of the power station. In fact, adding an external controller in this scenario can actually prevent the system from working, as the two controllers will “fight” each other to regulate the voltage. Always check the input voltage limits of your power station. Most 100W panels put out around 18V to 22V, which is well within the range of most power stations, but if you chain two panels in series, you might exceed the voltage limit and fry the station’s internal electronics. One more thing to check: the input wattage limit of your power station. Some entry-level units cap solar input at 65W or 100W, meaning you won’t see any benefit from a panel rated higher than that ceiling. Match your panel’s rated wattage to the station’s maximum solar input for the most efficient charging setup.
How long will it take to charge my 100Ah battery with a 100W panel?
This is the most common question and the hardest to answer accurately. Assuming your 100Ah Lead-Acid or AGM battery is at 50 percent (the lowest you should discharge it), you need to put back 50 amp-hours. In perfect conditions, a 100W panel might give you 5 or 6 amps per hour. This means you need about 8 to 10 hours of “peak” sun to fully recharge. Since you only get about 5 to 6 hours of peak sun per day, it will likely take two full days to recharge a 50 percent depleted 100Ah battery with a single 100W panel. This is why we emphasize power management; solar is great for maintaining a charge, but it is slow at bulk-charging a dead battery.
Building a reliable power system doesn’t require a professional electrical engineering degree or a massive bank account. By choosing a budget-friendly 100W portable panel from a reputable brand like Renogy, Goal Zero, or Jackery, you gain the freedom to stay off-grid for days or weeks at a time. The key is to prioritize durability and real-world efficiency over marketing gimmicks. Whether you choose the ruggedness of a glass suitcase or the portability of a folding fabric array, adding solar to your rig is the single best upgrade you can make for camp comfort. Stop worrying about your battery levels and start focusing on the trail ahead.
Pick up your solar panel today and start testing your power draw in the driveway before you head out on your next trip.