How to Reduce Overlanding Trip Costs Without Cutting Corners
This post contains affiliate links. As an Amazon Associate, I earn from qualifying purchases at no extra cost to you.
Overlanding is addictive, but fuel costs, campground fees, vehicle maintenance, and gear add up quickly. Most overlanders think they have two choices: spend big money or cut safety corners. That’s a false choice. The reality is that overlanding can be deeply satisfying on a modest budget if you’re strategic about where you spend and where you save.
Your biggest costs aren’t always where you think they are. Fuel waste, expensive campgrounds, neglected preventative maintenance, and poor gear choices that need replacement destroy budgets faster than anything else. This post cuts through the noise and shows you where to attack the problem: the decisions that move the needle without compromising reliability or safety.
You can start saving today. A No-Spill 1450 5-Gallon Poly Gas Can costs under $30 and pays for itself in a single trip by eliminating spills and making offroad refueling efficient. That’s the level of impact we’re talking about: practical gear that solves real problems and saves money.
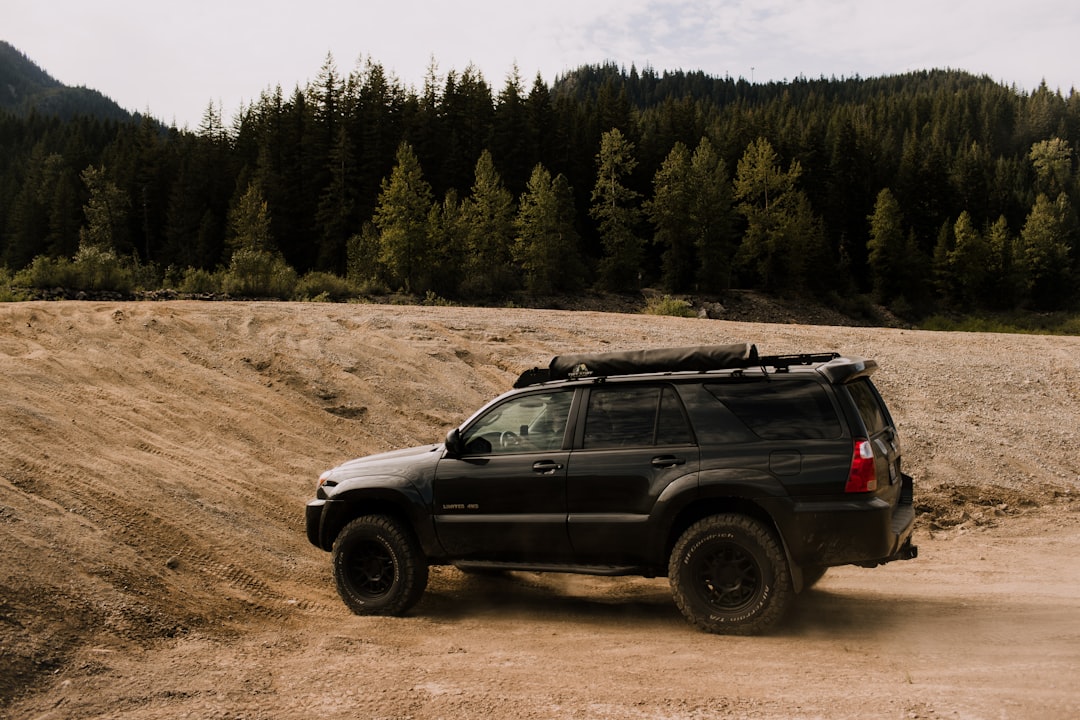
Photo by Blake Carpenter on Unsplash
Plan Your Route to Reduce Overlanding Trip Costs
Route planning is the lever that controls fuel consumption, campground fees, and trip duration. Most overlanders plan their trips backward: they know where they want to go and accept whatever fuel bill follows. Budget overlanders reverse that. You identify cost-efficient routes and build trips around them.
First, understand your vehicle’s fuel economy in realistic conditions. Highway economy means nothing offroad. Most vehicles burn 20–40% more fuel on rough terrain because of engine strain, loose terrain, and reduced tire grip. An SUV that gets 18 mpg on highway often returns 12–14 mpg offroad. Use this as your planning baseline, not the EPA sticker. Check fueleconomy.gov for verified fuel economy data on your specific vehicle model, then reduce the offroad figure by 25–35% for conservative trip budgeting.
Next, minimize distance while maximizing experience. A 600-mile loop that stays within 150 miles of home costs far less than a 1,200-mile trip to a famous destination. The experience quality isn’t proportional to distance. Regional gems exist near every overlander - you’ll find them on site-specific forums, in detailed topographic maps, and through word-of-mouth in local trail communities. Allocate your fuel budget to driving time on trails, not commute time on highways.
Consider fuel stops strategically. Before you start, identify the cheapest gas stations along and near your planned route. Rural areas often have lower prices than tourist towns. Carry extra capacity safely - a spare 5-gallon container lets you fill at cheaper stops and avoid premium prices at remote pumps. Calculate the marginal cost of carrying extra weight against the savings from cheaper fuel. For most vehicles, 50 extra pounds costs maybe 50 cents in fuel per 100 miles; a cheap fuel stop might save $2–5 per gallon times 4–5 gallons, so the math is clear.
Loop trips are cheaper than point-to-point trips. You start and end near home, eliminating the cost and hassle of a vehicle recovery or shuttle. They also force you to use existing roads efficiently rather than having the luxury of a one-way ticket. Many overlanders avoid loops because they feel repetitive. They’re not - different terrain looks entirely different on the return route, and you notice details you missed the first time.
Weather and seasonality affect your costs directly. Summer trips to popular areas mean crowded (and expensive) campgrounds. Winter trips often mean cheaper or free camping but higher fuel consumption for heating. Shoulder season trips - April, May, September, October in most regions - offer the best compromise: mild weather, lower camping pressure, and reasonable fuel economy. Plan your prime trips for shoulder season and save premium dates for low-priority exploration.
Fuel Efficiency and Smart Refueling Tactics
Fuel is your largest variable cost, and you have direct control over it. Most overlanders leave 10–20% of their fuel economy on the table through poor driving technique, vehicle neglect, and inefficient routing. Recovering that means real money in your pocket.
Maintain tire pressure obsessively. Under-inflated tires increase rolling resistance and burn fuel. Overlanders are tempted to lower tire pressure for trail traction - a legitimate move - but then they forget to air up for highway driving. Carry a portable air compressor and check pressure before every highway stretch. The fuel savings from 3 psi of proper pressure easily exceeds the minor weight cost of a compressor. Aim for the vehicle manufacturer’s recommended pressure (found on the driver’s door jamb or in your manual), not the tire sidewall pressure, which is the maximum safe pressure.
Reduce vehicle weight where it matters. Heavy aftermarket bumpers, brush guards, and cargo racks all increase fuel consumption. A 150-pound bumper costs roughly 5–7% more fuel over a 1,000-mile trip. That translates to $8–15 in extra fuel costs. Factory bumpers aren’t cool, but they’re free in fuel economy. Prioritize lightweight modifications: aluminum body panels, smaller winches (if necessary), and minimal cargo. You don’t need to carry every tool and spare on every trip. Audit what you actually use and leave the rest at home. Gear you don’t use is gear you’re paying to transport.
Skip premium fuel unless your engine requires it. Most offroad vehicles run 87-octane without issue. Premium fuel is 10–40 cents per gallon more expensive and provides zero benefit if your engine doesn’t need it. Check your owner’s manual or fuel door. If it says 87 is okay, never buy premium. This single decision saves $80–200 per year for someone taking regular overlanding trips.
Carry extra fuel safely, and carry it strategically. Most overlanders pass up cheap fuel stops because they’d have to backtrack or divert. A No-Spill 1450 5-Gallon Poly Gas Can ($25–30) lets you fill opportunistically at remote stations where prices are predictably lower. The nozzle design eliminates spills on rough terrain, so you’re not wasting fuel or contaminating your rig. For a week-long trip, this single purchase might save $30–50 in fuel costs alone.
Drive smoothly and anticipate terrain. Aggressive acceleration and braking waste fuel and wear suspension faster. Smooth inputs on the throttle improve economy by 5–10%. Anticipate rough sections ahead and choose lines that maintain momentum without aggressive gear changes. This is partly fuel economy, partly preservation of vehicle components, and partly safety - which means it’s a trifecta of cost savings that compounds across every trip you take.
Choose Free and Low-Cost Campsites
Campground fees destroy overlanding budgets. Premium private campgrounds charge $30–80 per night. Developed public campgrounds run $15–30. Free camping exists and requires knowledge and timing. The difference between one week of $50-per-night camping and free camping is $350 in pure savings.
Learn to camp on public lands without developed sites. In the US, the vast majority of BLM (Bureau of Land Management) land allows free dispersed camping. Visit blm.gov to download free maps and find allowed dispersed camping areas near your route. You need a map, the willingness to camp without water or bathrooms, and basic skills. Most overlanders feel stranded without these amenities; they’re optional. A gallon of water per person plus a shovel and a headlamp solve the practical problems. Dispersed camping takes an afternoon to find the first time; after that, it’s your default.
National Forests also allow dispersed camping with similar rules and regulations. Use mapping tools to locate dispersed sites that others have used (indicated by flat areas and fire rings). Don’t pioneer new sites in fragile areas; stick to established ones to preserve the landscape and respect leave-no-trace principles.
Develop a lightweight camp kitchen to avoid restaurant meals. Restaurant food costs $12–25 per meal. Cook your own meals for $3–5. A lightweight camp stove dramatically reduces total trip costs. The Esbit Lightweight Folding Pocket Camp Stove ($12–15) burns solid fuel tablets and takes zero space in your rig. Pair it with simple meals: pasta, rice, beans, eggs, and coffee. You’ll eat better than restaurants, spend less, and actually enjoy the process. Most overlanders underestimate how much their trip budget improves when they stop eating every meal at town diners.
Camp in off-season windows. Peak season (summer, holiday weekends) fills campgrounds and drives prices up. Winter and shoulder season mean empty sites and lower prices. If you can shift your trip by 2–3 weeks to avoid peak dates, you’ll find significantly cheaper camping and far fewer people competing for space.
Build relationships with private landowners who allow camping. Local forums and communities often have lists of private land where landowners grant free or cheap camping to overlanders. This takes time to develop but costs nothing and beats any commercial option.
DIY Vehicle Maintenance Between Trips
Preventative maintenance is cheap; emergency repairs are expensive. This is the simplest cost-saving truth in overlanding, and most people ignore it. A $20 oil change now prevents a $2,000 engine rebuild later. A $5 battery terminal cleaning prevents an inconvenient breakdown on the trail and a $500 recovery bill.
Learn to perform basic maintenance yourself. Oil and filter changes, fluid top-ups, spark plug inspection, brake pad checks, and tire rotation all save money and teach you your vehicle. YouTube guides specific to your make and model exist for every common job. The first time you change your own oil takes an hour; by the third time, you’re 20 minutes in. At $75–150 per shop oil change, you break even after 3–4 DIY changes. The savings multiply annually.
Carry a minimal spare parts kit designed around failure modes you’ve actually experienced or that are common for your vehicle. Generic kits sold in stores include items you’ll never need and waste cargo space. Instead, ask other owners of your vehicle what they’ve had to replace in the field. Common items include extra belts, hoses, fuses, fluid bottles, brake fluid, spare wheel bearings, and suspension hardware. Store these in a Sea to Summit Lightweight Dry Sack ($18–25) to keep them organized, protected from dust, and easy to find. A damage-protected spare part is worth twice what you paid for it when you need it on the trail.
Monitor fluid levels religiously. Every morning before you drive, spend 30 seconds checking oil, coolant, brake fluid, and transmission fluid. Overheating or low oil pressure are preventable catastrophes if you catch them early. Most overlanders check these only when something smells wrong - which is too late. Early detection saves thousands in repairs.
Replace wear items before they fail. Tire tread, wiper blades, battery age, and hose condition are predictable. Replace them between trips, not on the trail. An $80 battery replacement at home beats a $300 recovery plus a $200 tow and a damaged rig.
Tires are your biggest maintenance variable. Cheap tires cost less upfront but wear faster and grip worse in varied terrain, leading to more damage to your vehicle overall. Mid-range tires ($120–180 each) represent the sweet spot for budget overlanders: real offroad capability without paying for premium branding. Avoid the absolute cheapest tires and avoid premium tires unless your trips are extreme and technical.
Smart Overlanding Purchases: Avoid Mistakes and Use a Decision Framework
Common Overlanding Cost Mistakes to Avoid
Overlanders make predictable financial mistakes that destroy budgets without improving capability. Understanding these mistakes protects your wallet and saves thousands across your overlanding lifetime.
Buying duplicate gear. New overlanders accumulate multiple versions of the same item: two camp stoves, three flashlights, four tarps. Duplication happens because you’re unsure what you’ll need, so you buy options. Buy one high-quality version of essential items and resist the urge to upgrade or add backups until you’ve actually used the original on multiple trips. Many overlanders discover that they prefer hotels to tents, which means an $800 tent purchase was waste. Test before you commit to expensive purchases. Borrow from friends first if possible.
Premium brands for items that don’t matter. Overlanding culture prioritizes brands, and expensive brands feel safer. A $200 brand-name cooler keeps food cold identically to a $60 generic cooler. A $400 sleeping bag keeps you warm just like a $150 sleeping bag rated for the same temperature. Spend on performance differences - insulation rating, capacity, durability - not brand names. Save brand-name budgets for critical items: vehicle parts, tools, and suspension components where engineering and warranty matter.
Overpacking and carrying unnecessary weight. Weight costs fuel, strains suspension, and increases wear. Most overlanders carry 40–60% items they don’t use on any given trip. Gear creep is real and insidious. Create a trip-specific packing list and ruthlessly cut items you didn’t use on the last trip. A 100-pound weight reduction can save 8–10% on fuel over a week-long trip - roughly $20–40 depending on fuel prices. That’s significant on every trip you take.
Skipping DIY training because “the dealer will handle it.” Dealer maintenance is convenient and costs 2–3x more than DIY. A dealer oil change ($75–150) versus DIY ($15–25) seems small until you’ve done it four times per year for five years. The cumulative cost difference is $800–2,400. Worse, when you’re on the trail and something breaks, you can’t call the dealer. Skills pay off in emergencies and savings.
Ignoring fuel economy in vehicle selection. An SUV that gets 12 mpg instead of 15 mpg costs $600+ per year in extra fuel for an overlander who drives 10,000 trail miles annually. Over five years of ownership, that’s $3,000 in wasted fuel. The vehicle you choose is the decision that matters most. Small improvements in efficiency compound massively over time.
Buying recovery gear before you need it. Winches, snatch blocks, and traction aids seem essential when you’re new. Most overlanders rarely use them and could solve their problems more cheaply with skill and judgment. Instead, develop recovery skills and judgment that prevent being stuck, and join a local overlanding group where recovery is shared equipment. A $1,500 winch you never use is waste. A $50 annual membership to a local club is an investment.
Budget Decision Framework for Every Overlanding Purchase
Use this framework every time you’re tempted to buy overlanding gear or upgrades. It takes five minutes and saves you from impulse purchases that clutter your rig and drain your budget.
-
Define the actual problem. Not “I want better lighting” but “I can’t navigate safely in darkness.” Not “I need recovery gear” but “I frequently get stuck on difficult terrain and need mechanical advantage.” The more specific you are about the problem, the better solution you’ll find.
-
Research free or cheap solutions first. Can you solve it with existing gear? Can a buddy help with loaner equipment? Does a used market exist for the item? Is there a DIY option? You’ll be shocked how many overlanding problems solve themselves through creativity before money gets involved.
-
Identify minimum viable purchases. What’s the cheapest item that actually solves the problem? Not the most capable or the best-reviewed - the one that works for your specific use case. A mid-range solution beats both the bottom-tier item that fails and the premium item you overpay for.
-
Calculate the cost per use. A $300 recovery tool that gets used once per year costs $300 per use. A $30 flashlight used 50 times costs 60 cents per use. Frequency matters more than absolute price. Items you’ll use weekly are worth more investment than items you’ll use yearly.
-
Make the purchase. Once you’ve decided through this framework, buy it without regret. Avoiding purchases to save money is false economy if the item actually solves a real problem. But make sure you’ve actually worked through steps 1–4 first. Most impulse purchases skip these steps.
This framework transforms you from a reactive buyer (seeing cool gear and buying it) to a strategic buyer (solving problems efficiently). Strategic buyers spend less and have more functional rigs.
FAQ
Q: Should I go with a premium campground or dispersed camping?
A: Dispersed camping is almost always better for budget overlanders. Premium campgrounds offer amenities - showers, hookups, restaurants nearby - that you’ll rarely use offroad. You’ll sleep better in a quiet, remote location than at a crowded campground anyway. The cost difference of $40–60 per night compounds dramatically. For a month-long trip, that’s $1,200–1,800. Dispersed camping requires slightly more preparation: water management, waste disposal, finding your own spot. But preparation beats cost every time. Switch to dispersed camping as your default and use commercial campgrounds only when you need a shower day, have guests visiting, or are between trips close to home. Most experienced budget overlanders camp free 90% of the time.
Q: Is it worth doing my own maintenance, or should I pay a shop?
A: It’s worth learning the basics but outsourcing specialized work. Oil changes, filter replacements, fluid top-ups, and basic troubleshooting are worth learning and doing yourself. Complex jobs - transmission work, electrical diagnosis, suspension rebuilds - are better handled by shops unless you have the tools and experience. The multiplier effect of learning basics is huge: you’ll catch problems earlier, understand your vehicle better, and spend less over time. Most overlanders who’ve done their first DIY oil change or tire repair become advocates for the practice because the saving is immediate and tangible. Budget $50–100 to buy the basic tools (wrench set, oil drain pan, filter wrench, jack). You’ll recoup that in your first three oil changes.
Q: How can I reduce my trip duration to save money?
A: Shorter trips save money but often feel rushed. Instead, think about proximity. A five-day trip 150 miles from home costs less than a 10-day trip 600 miles away, even though the latter is longer. You spend less on fuel commuting and have better camping options nearby. Once you’ve committed a day of driving to reach a destination, you’re sunk cost. Stay closer to home and accept that you’ll make fewer trips but spend less per trip. Quality matters more than distance. A meaningful weekend 50 miles away beats a rushed road trip 300 miles away. Regional overlanding is actually more satisfying because you can repeat routes and go deeper into them seasonally.
Q: What’s the cheapest gear that’s actually reliable?
A: The cheapest often works fine; the absolute cheapest sometimes fails catastrophically. There’s a sweet spot: mid-range products from established brands. For most gear, that range is $50–200. Cheaper items in that range have worked fine for other overlanders documented in forums. Read reviews from overlanders on Reddit and specialized forums, not general camping forums - overlanders have different standards and use cases. A product that receives 4.2 stars from 300+ reviews has way more predictive value than a glowing review from a single person. Buy conservatively at first and upgrade only if you actually use the item and find its limitations. The best budget overlanding purchases are items that solve your specific problem at a price you’re comfortable replacing if needed.
Conclusion
Overlanding on a budget isn’t about sacrifice; it’s about priorities. You prioritize miles over amenities, skills over gear, and strategy over spending. The overlanders who have the most fun often spend the least because they’re forced to be creative and intentional.
Start with the biggest levers: fuel economy, camping costs, and preventing maintenance neglect. These three decisions control 70% of your trip costs. Master those and work backward toward the smaller items. Buy gear that solves real problems, skip things you don’t use, and sell what you outgrow.
Your next trip should feel financially sustainable, meaning you can take trips regularly without financial stress or guilt. Mastering budget overlanding is learning to maximize experiences per dollar spent - which is a skill that applies far beyond the trail.
Keep your rig trail-ready without the premium price tag. Bookmark this post for your next trip planning session, and check back when you’re building your budget.
Related Reading
For more on keeping your costs down without cutting safety, read Budget Overlanding Gear That Isn’t Worth the Savings to understand which shortcuts actually hurt your rig. Then check out How to Plan Your First Multi-Day Overland Trip for a complete planning framework that sets you up for cost-efficient trips from the start.