DIY Rock Sliders: Materials, Templates, and Welding on a Budget
This post contains affiliate links. As an Amazon Associate, I earn from qualifying purchases at no extra cost to you.
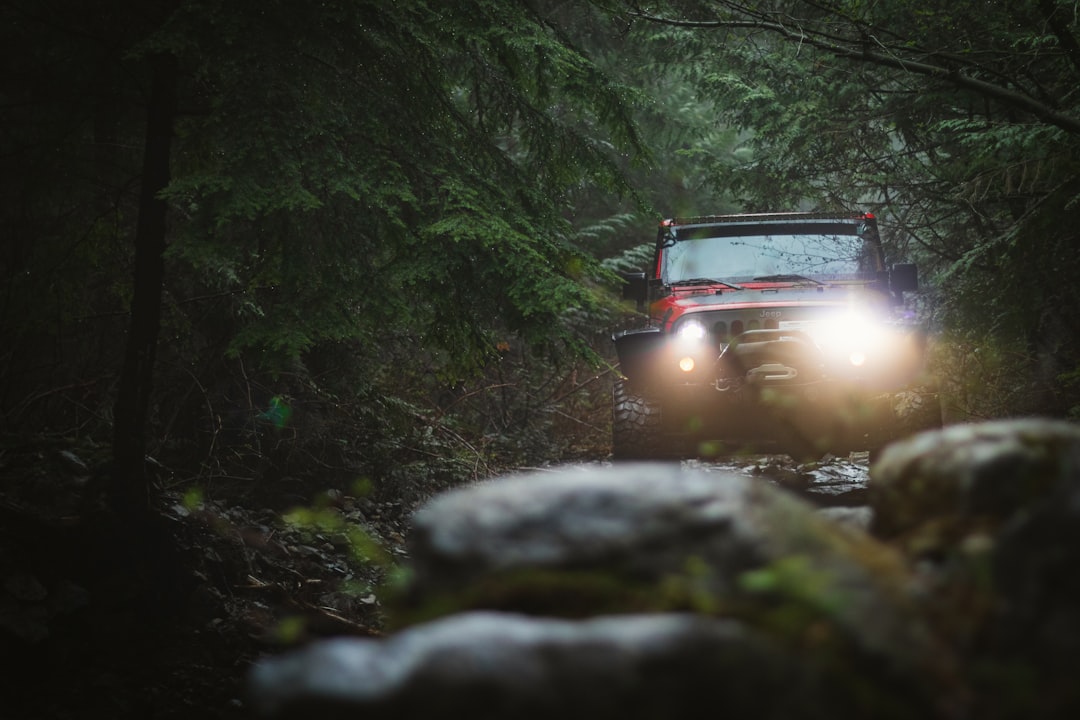
Photo via Unsplash
Rock sliders are one of the best bang-for-buck upgrades you can bolt onto a budget overlanding rig. A premade set from a tier-one manufacturer will run $800–$1,500. Build them yourself, and you’ll walk away with a set of sliders that’ll take the same rocks, the same high-center hits, and the same trail punishment - for under $400 in materials and a weekend of welding. This isn’t a shortcut; it’s how most of the forum builders do it, and it’s how you get durability-per-dollar that premade kits simply can’t match at that price point.
The honest truth: rock sliders aren’t pretty. They’re functional armor. They’re meant to take impacts so your rocker panels, doors, and lower frame don’t. And if you’re building them yourself, you get to size them exactly to your rig and weld them to your exact specification - no gap, no compromise, no factory weak point.
This guide will walk you through material selection, measuring your rocker panels, tooling up, and the step-by-step build process. By the end, you’ll understand why YESWELDER Anti-Spatter Welding Gel 500ml (~$15) is a small investment that saves enormous frustration, and how to avoid the most common mistakes that result in weak welds or fitment gaps.
What Rock Sliders Do and Why Budget Rigs Need Them
Rock sliders are steel tubes that run along the lower rocker panels of your vehicle. When you hit a rock, a log, or a rut while turning or when the rig leans, the slider absorbs that impact instead of your door, frame, or wheel well.
A budget overland rig probably doesn’t have expensive full armor. Your doors are stock. Your frame might not be reinforced. That’s exactly why sliders matter. They’re the cheapest structural protection you can add - and they take the hits that would otherwise result in a crumpled door or a trip to the body shop that costs more than your entire build budget.
Factory sliders on mainstream trucks are either missing or thin stampings that won’t survive hard use. Aftermarket sliders start at $600 and climb fast. DIY rock sliders give you something heavier, stronger, and more rigid than either for a fraction of the cost.
The math is simple: if you value your rig enough to take it off-road, you value it enough to protect it. Rock sliders are the first line of defense. And at under $400 in materials, they’re non-negotiable for any budget build that leaves pavement.
Steel Selection: DOM vs ERW vs Square Tube
Before you order steel, you need to understand the difference between the tube types available. This matters because you’re building something that needs to absorb impacts and not fail.
DOM (Drawn Over Mandrel) Tubing is the standard in the build community. It’s a seamed tube that’s been drawn over a mandrel to ensure uniform wall thickness and roundness. DOM tubes are stronger, more ductile, and weld cleaner than ERW. If you see forum builds or professional sliders, they’re DOM. The cost premium is real - maybe $15–$20 more per tube - but the weld quality and strength justify it.
ERW (Electric Resistance Weld) Tubing is cheaper. It’s electrically welded, and the seam can be a weak point if your welds don’t overlap it correctly. You’ll see budget builds using ERW, and it works, but you’re introducing a potential point of failure. The savings isn’t worth the risk when you’re protecting your rig from rock impacts.
Square Tube is an alternative to round DOM. It’s stiffer (better for resisting deformation on impact), but it doesn’t tuck under the rocker as cleanly. Round tubes sit closer to the body and are more forgiving if your fitment isn’t perfect. For first-time builders, round DOM is the safer choice.
Dimensions: Most sliders use 1.5-inch OD (outside diameter) x 0.120” wall thickness. This is the sweet spot - strong enough to absorb impacts, light enough to not add excess unsprung weight, and thick enough to weld without burning through. Some builders go 1.75” or 2” OD for heavier rigs; for a budget rig, 1.5” is standard.
You’ll typically need about 30–40 feet of tubing per slider set, depending on your rig’s length. That’s roughly $80–$120 worth of material at current steel prices. Check metals depot or a local steel supplier for the exact cost in your area; prices fluctuate with commodities markets.
Tools You Need to Build Rock Sliders
Rock slider building is a welding project. If you don’t already have a welder, you have three options: buy one, rent one, or trade labor with someone who owns one. For a budget builder who thinks they’ll do more projects, buying a basic MIG welder makes sense. For a one-off project, renting or bartering is fine.
Welding Equipment:
- MIG Welder: The Lincoln Electric Easy MIG 140 Welder (~$580) is the most common entry-level MIG welder you’ll see in overland forums. It runs on 120V household current, so you don’t need a 240V circuit. It’ll weld mild steel up to about 3/16” thickness, which is perfect for 0.120” DOM tubing. Alternatives include the Hobart Handler and Miller Bobcat (both in the $500–$700 range). Rent one for $40–$80 per day if this is your only project.
- Wire and Gas: Get 0.035” mild steel wire (AWS ER70S-6) and a 75/25 argon/CO2 mix. Budget $30–$50 for wire and $20–$40 to fill a gas bottle.
- Welding Helmet: A basic auto-darkening helmet is $50–$80. Don’t skimp on this; a cheap helmet will mess with your vision and your welds.
- Welding Gloves and Apron: $15–$25. Get leather; the sparks will eat cotton.
Cutting and Grinding:
- DEWALT 4.5-Inch Angle Grinder (~$75): You’ll use this to cut tubes to length, grind welds, and prep surfaces. It’s a workhorse.
- Cut-Off Discs and Grinding Wheels: Budget $20–$30 for a variety pack.
Fabrication and Measuring:
- Tape Measure and Carpenter’s Square: Standard tools; you probably have these. If not, $15 total.
- Soapstone or Marker: For marking cut lines. $5.
- Drill and Bits: For test-fitting, adding drain holes, and welding fixture holes. You probably have this.
Safety:
- Safety Glasses: $10–$15.
- Work Gloves: You’ll need tough leather when handling steel and grinding burrs.
- Respirator or Dust Mask: For grinding; P100 rated. $20–$30.
- YESWELDER Anti-Spatter Welding Gel 500ml (~$15): This is not mandatory, but it’s a game-changer. It reduces spatter cleanup and makes post-weld grinding and painting way faster. Apply it to the area around your weld; it’ll keep spatter from sticking to the metal.
If you already have a welder, grinder, and the standard hand tools, your tool cost is near zero. If you’re starting from scratch and buying, budget $800–$1,000 for decent tools. If you rent a welder, you’re at $100–$200.
How to Measure and Template Your Rocker Panels
Getting the fit right before you start cutting is the difference between a one-weekend build and a three-weekend build. Measure twice, cut once.
- Get Under Your Rig
Pull the rig into a spot where you can get under it safely - on ramps or jack stands with blocks, never just on a jack. You need to see the rocker panel from front to rear. The rocker is the body panel below the door; it connects the front fender to the rear quarter panel.
- Trace the Rocker Profile
The rocker isn’t a flat surface - it’s curved, and that curve changes from front to rear. Use a flexible metal ruler or a cardboard template. I prefer cardboard. Cut a rough shape from a cardboard box, hold it against the rocker, and trace along the bottom edge with a marker. This gives you the profile at that location. Do this at three points: near the front wheel, at the door mid-point, and near the rear wheel.
- Measure Height
The slider should sit about 2–4 inches below the bottom of the door. This gives you protection without protruding so far that it hits every speed bump. Measure the height from the ground to where you want the slider mounted. Record this for each section. Typically, the slider will be 12–18 inches off the ground, depending on your rig’s stance.
- Account for Suspension Movement
If your rig has lift springs, the body rides higher when the truck bounces. The slider needs to clear the tire at full compression. Get a helper to bounce the truck and watch the clearance. You’re looking for at least 1 inch of clearance between the slider and the tire at full compression. If your truck has significant lift and oversized tires, you might need to trim the slider back or angle it slightly inboard.
- Check for Obstacles
Trace around fuel tanks, transmission crossmembers, exhaust, and brake lines. The slider can’t go through these. On some trucks, you’ll need to create a bend or a slight offset to clear a feature. This is normal. Note these locations.
- Create a Full-Size Template
Transfer your measurements to a long sheet of kraft paper or cardboard. Mark the height at each cross-section, the profile of the rocker at those points, and all obstacles. This is your blueprint. Lay it on your tube stock and adjust until the fit is perfect. This template saves you from cutting and grinding out mistakes later.
Step-by-Step Build Process
Once you have your template, the actual build is mechanical and methodical. Take your time with each step; a rushed weld is a weak weld.
- Cut and Prep Your Tube Stock
Cut your tubing to length using the template. Use the angle grinder with a metal cut-off disc. Make perpendicular cuts; angled cuts make it harder to maintain flat welds. After cutting, use a wire brush wheel on the grinder to clean rust and scale from the tube surfaces. This improves weld quality. You want bare metal going into the welder.
- Create Mounting Points
Rock sliders need to bolt to the frame. Identify frame attachment points near the rocker - usually two forward and two rearward per side. Drill holes into the slider tube at these points (1/2-inch holes for 3/8” bolts, with a 1-inch washer to spread the load). Alternatively, weld tabs onto the tube and drill into those tabs. Welded tabs are stronger; drilling directly into the tube weakens it slightly.
- Mock-Fit the Slider
Clamp the tube to your rig using your template as a guide. Get the height and profile right. Use a carpenter’s square to check that the tube is parallel to the ground along its length. Small misalignments will be obvious after welding. Take a photo of this setup; you’ll use it as a reference while welding.
- Set Up Your Welds
Rock sliders are typically welded to tabs that are bolted (not welded) to the frame. This preserves frame integrity and makes removal possible if needed. Some builders weld directly to the frame, but that’s permanent and risks weakening the frame structure.
Create tabs from 1/4” steel plate (cut into roughly 3” x 3” squares). Drill a hole in each tab and bolt it to the frame. The slider tube will then bolt to this tab. You can also weld the tab to the tube and bolt the whole assembly to the frame.
Alternatively, and more commonly, you’ll weld the slider directly to the rocker panel or to the body/frame connection. This is permanent. Check local forums and builds for your specific rig to see what other builders did; you don’t want to drill into the frame if the rocker weld is strong enough.
- Weld the Tube
This is the critical step. Use a test plate to dial in your welder settings before you start welding on the actual slider. Your welder manual will give you starting points; adjust from there.
For 0.120” DOM tubing and 0.035” wire on a 140-amp MIG welder:
- Wire speed: around 200 inches per minute (adjust based on your specific machine)
- Voltage: around 18–20 volts
- Travel speed: steady and controlled, about 6–8 inches per minute
Run a bead along the length of the slider where it meets the rocker or tab. Keep the nozzle angle consistent (roughly 45 degrees to the tube surface), and maintain a 1/8-inch gap between the contact tip and the metal. Listen for a steady “sizzle”—that’s the sound of a clean weld.
Weld both sides of the tube if possible (top and bottom). This distributes the load and increases strength. If you’re welding to a rocker panel, weld the top surface. If you’re welding to a tab, weld around the perimeter of the tube as much as feasible.
Let the weld cool naturally. Don’t quench it with water; that can cause brittleness.
- Grind and Finish
Once the weld is cool, use the angle grinder to smooth the welds. Remove any high spots that could catch rocks or protrude past the rocker. A smooth weld also looks professional and is easier to paint.
Apply a wire brush to remove any rust or discoloration. Then clean the area with a cloth. If you used anti-spatter gel (YESWELDER Anti-Spatter Welding Gel 500ml), it’ll peel right off.
- Paint
Apply a rust-inhibiting primer (spray or brush), then a topcoat. Matte black is the overlander standard. Use a steel-specific paint. Most builders skip the fancy finish and just use rustoleum or similar; it’ll take a beating anyway, so pretty paint is wasted money. One topcoat is fine; the key is the primer underneath.
Common Mistakes and How to Avoid Them
Mistake 1: Underestimating Measurement Skipping the template and fitting “eyeball style” is the fastest way to end up with a slider that doesn’t fit. Build the template. It takes an hour and saves three.
Mistake 2: Welding Over Rust Rust in the joint creates a porous weld. Always wire-brush the tube and the mounting surface until they’re bare metal. This is non-negotiable.
Mistake 3: Rushing the Welds A sloppy weld that looks okay from the side might have porosity or lack fusion. Take your time. Let the weld cool. Inspect it. If it looks sketchy, grind it out and reweld. A weak weld will fail when you need it most.
Mistake 4: Welding to the Rocker Panel Alone Rocker panels are thin sheet metal. If you weld the slider directly to the rocker without backing plates or frame engagement, the rocker will eventually crack from the stress concentration. Either use backing tabs welded to frame rails, or weld to a frame attachment point in addition to the rocker.
Mistake 5: Not Planning for Obstacles Fuel tanks, brake lines, transmission pans, and exhaust systems are in tight spaces. Hit one with your slider during an impact, and you’ve got a catastrophic problem. Spend time under the rig before you start; know what’s there.
Mistake 6: Wrong Bolt Size or Spacing If you’re bolting the slider to frame tabs, use 3/8” bolts minimum with washers. Space them no more than 18 inches apart. Loose spacing means flexing, which means cracked welds.
Mistake 7: Not Accounting for Suspension If your rig has lifted suspension and bigger tires, the slider might hit the tire at full compression. Get under the truck, bounce it, and watch the clearance. You need at least 1 inch minimum.
Budget Breakdown: What This Actually Costs
Here’s what a complete rock slider build costs for a typical budget rig:
| Item | Quantity | Cost per Unit | Total |
|---|---|---|---|
| DOM Tubing (1.5” OD, 0.120” wall) | 40 ft | $2.50–$3.50/ft | $100–$140 |
| Steel Plate (backing tabs, 1/4”) | 20 lb | $0.50–$0.70/lb | $10–$14 |
| Bolts, Washers, Hardware | bulk | — | $15–$20 |
| Angle Grinder (if new) | 1 | $75 | $75* |
| MIG Welder (if new) | 1 | $500–$600 | $500–$600* |
| Welding Wire & Gas | set | — | $50–$60 |
| Welding Helmet | 1 | $60–$80 | $60–$80* |
| Welding Gloves & Safety Gear | set | — | $30–$50 |
| Anti-Spatter Gel | 500ml | $15 | $15 |
| Primer and Paint | cans | — | $20–$30 |
| Total (with tools) | — | — | $875–$1,089 |
| Total (tools already owned) | — | — | $260–$350 |
*If you already own a welder, grinder, and helmet, your actual material cost is under $300. If you’re buying tools, the investment is higher, but these tools pay for themselves on your second or third project. Rent a welder for $50–$80 per day if this is truly a one-time build.
For budget overlanders, the cost-per-protection ratio is unbeatable. A factory set of sliders costs $800–$1,500. A DIY set costs $300–$350 in materials (or $1,000 if you’re buying all the tools). Even with tools, you break even after one build, and the quality is often better because you control the fitment.
FAQ
Q: Can I build rock sliders without welding experience?
A: Yes, but plan for a learning curve. Practice on scrap metal first. Your first few welds will look ugly; that’s normal. As long as you’re maintaining consistent travel speed and wire feed, the penetration will be good even if the appearance is rough. Watch YouTube videos from reputable welders (Welding Tips and Tricks, AvE, professional channels). If you’re really uncomfortable, consider taking a one-day MIG welding class at a community college (usually $50–$100). The confidence boost is worth it, and you’ll dial in your technique faster.
Q: What if I don’t have a welder or access to one?
A: You have three options: (1) Rent a welder for $40–$80 per day from a tool rental place. (2) Find a friend or local maker space with a welder and trade labor or a six-pack. (3) Buy a basic welder; a used one goes for $300–$400 on Craigslist. If you plan to do more work on your rig (skid plates, bumpers, etc.), buying used is a good investment.
Q: Can I use square tubing instead of round?
A: Yes, and some builders prefer it because it’s stiffer. The trade-off is fitment; square tubes don’t tuck as closely to the rocker, so you need to be more careful with measurement. They also look more angular and less OEM. For a budget build, round DOM is the standard for a reason: easier to fit, plenty strong, and more forgiving of measurement errors.
Q: How do I know if my welds are strong enough?
A: Visual inspection is the start. A good weld should have a consistent bead with no gaps, porosity, or undercut (where the weld pulls away from the base metal). If you can see light through the bead or if it looks like the weld is sitting on top of the metal without fusion, it needs work. For a stress application like this, I’d recommend a bend test on scrap: weld a piece of tube to a plate, clamp it, and apply force with a hammer. A solid weld will bend the tube before the weld breaks. If the weld separates cleanly, it wasn’t fused properly.
Q: How often do I need to inspect or maintain the sliders after building them?
A: Inspect them annually, especially after hard trail use. Check for cracks in the welds or frame attachment points. Touch up any paint damage to prevent rust. If you see a crack, stop using the rig until it’s repaired. A rock impact that causes a weld crack will do it again if not fixed.
Q: What if my rig doesn’t have a strong rocker panel to weld to?
A: Some rigs (older models, certain trucks) have thin rockers that won’t hold a weld. In this case, weld backing plates to the main frame rails on the underside, then bolt (don’t weld) the slider to these plates. This keeps stress off the rocker and on the structure that can handle it.
Q: Can I run sliders on a lifted truck with big tires?
A: Yes, but you need to plan for tire clearance. A lifted rig with oversized tires will have less ground clearance. Get under the truck, bounce the suspension, and measure the clearance between the slider and the tire. You need at least 1 inch minimum. If you’re tight, you can trim the rear section of the slider or angle it inboard slightly.
Building your own rock sliders is a weekend project that costs under $400 in materials and gives you professional-grade protection. It’s cheaper than buying, teaches you welding skills you’ll use on your next project, and results in a set of sliders tailored exactly to your rig.
Start with the template, take your time with the welds, and don’t rush the fit. If you’re worried about the welding, practice on scrap first. The weld quality matters, but even an imperfect weld that has fusion is better than no armor at all.
For more budget protection, check out our guides on DIY skid plate options for budget builds and budget axle differential protection. Both are in the same cost-to-protection ballpark as rock sliders.
Steel suppliers like metals depot and local steel yards usually stock DOM tubing in common sizes. For welding forums and community builds, check the IH8MUD forum and your vehicle-specific subreddits - they’ll have builds from people with your exact rig, complete with measurements and lessons learned.