Best Trail Communication Radios for Solo Overlanders: $100-$500 Compared
This post contains affiliate links. As an Amazon Associate, I earn from qualifying purchases at no extra cost to you.
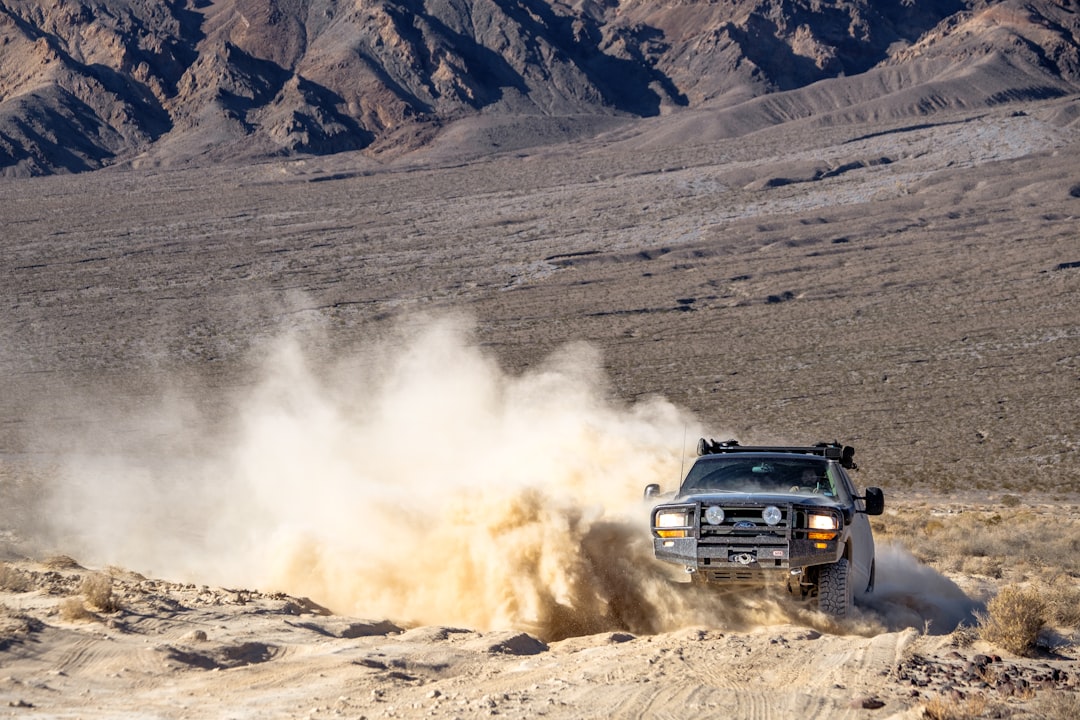
Photo by Chris Cordes on Unsplash
Going out alone is one of the best ways to travel overland - no schedule friction, no debating campsites, no waiting on the convoy. But it also means there’s nobody behind you to notice when you don’t come back. Trail communication gear is the single most important safety layer a solo overlander can carry, and yet it’s one of the most misunderstood categories in the space.
When you’re running with a group, communication is largely about coordination - staying together on a trailhead, calling a winch assist, or letting the back of the convoy know the lead truck stopped. Solo is different. You have no convoy, no spotter, no chase vehicle. Your communication gear is the only mechanism by which the outside world knows you’re okay - or knows something went wrong. That changes the way you should think about the problem. You’re not just looking for a way to talk to nearby vehicles. You’re looking for a way to call for help when nobody else is nearby, report your position when you don’t come back to camp, and reach emergency services across terrain where cell phones are decoration.
The practical upshot is that a solo overlander generally needs two types of communication gear: something for trail-to-trail or vehicle-to-vehicle contact in the moment, and something that reaches emergency services regardless of terrain. These two needs map to two different product categories with very different price points.
People either underinvest in a cheap bubble-pack FRS radio that dies the moment it rains, or they swing to the other extreme and assume they need a $700 satellite communicator before they’re allowed to leave the pavement. The truth is somewhere in the middle, and the right answer depends almost entirely on what kind of terrain you’re running and how far from help you typically are.
The cheapest useful radio in the overlanding world right now is probably the Radioddity GM-30 GMRS Handheld Radio, which gives you five watts on GMRS frequencies with repeater capability and NOAA scanning for less than what most people spend on a recovery strap. That’s a legitimate trail radio - not a toy. But it’s also the floor of what you should be considering, not the ceiling. For most solo overlanders doing multi-day routes with variable cell coverage, a layered communication strategy beats any single device. This article walks through the full $100–$500 budget range, explains the tradeoffs at each tier, and tells you exactly what to buy based on how you actually use your rig. Read our guide to solo overlanding safety fundamentals for the full picture on how communication fits into your broader preparedness strategy before you start buying gear.
The GMRS License: Get It First
Before you buy anything, you need to understand the regulatory landscape. FRS radios - the kind that come in blister packs at Walmart - are license-free but limited to two watts on most channels and fixed, non-removable antennas. GMRS radios can run up to five watts on handhelds and fifty watts on mobiles, accept external antennas, and generally outperform FRS in real-world range. The catch is that GMRS requires a license from the FCC, which costs $35 and covers your entire household for ten years. No exam required - just the fee.
That $35 is the best money you’ll spend in this category. It opens up the full GMRS band, lets you legally use repeaters (which dramatically extends range in mountainous terrain), and covers every family member on one license. If you’re serious about overlanding, you need to pick up a GMRS license before you invest in anything above a basic FRS handheld. The enforcement risk is real, and more importantly, the licensed GMRS ecosystem is where the genuinely useful gear lives.
Tier One: GMRS Handhelds Under $50
The GMRS handheld tier is the entry point for trail communication and the most frequently underestimated. These radios are small enough to clip to a belt loop, battery-powered, and ready to use the moment you pull them out of the box. They’re not a substitute for a mounted mobile radio in terms of raw power, but they serve two functions no other device covers: they go with you when you leave the vehicle, and they’re available for another party to use when your main radio is being monitored on a different channel.
At this price point, you’re looking at five-watt GMRS handhelds. The Radioddity GM-30 mentioned earlier is the benchmark - solid build quality, GMRS repeater capability, and NOAA scanning receiving. It offers full GMRS channel coverage including the eight FRS channels for interoperability. The programming interface is straightforward enough to use on the trail when you’re trying to add a repeater frequency in the field.
Realistically, expect 1–3 miles of line-of-sight range on flat terrain, dropping to under a mile in canyon country. That’s enough for site-to-site communication at a camp, signaling to a passing vehicle, or reaching a repeater that extends your range dramatically. What it won’t do is reach emergency services in deep backcountry, punch through mountains, or let you communicate with a base contact when you’re three drainages away from anyone. Know the limits, and this tier earns its place in your kit.
What to grab at this tier: One or two GM-30 units as supplemental handhelds.
Tier Two: GMRS Mobile Radios Under $200
This is where solo overlanders who run established trail systems and recreation areas should be spending most of their communication budget. A dashboard-mounted GMRS mobile radio pulls from your vehicle’s electrical system instead of AA batteries, connects to a properly mounted external antenna, and runs substantially more power than any handheld. The result is real, usable range — 5 to 20 miles in open terrain depending on antenna placement and terrain, and reliable repeater access in areas with GMRS infrastructure.
The Radioddity DB20-G GMRS Mobile Radio is the most frequently recommended unit in this category and earns that reputation. It puts out 20 watts on GMRS frequencies with 500 channels and VOX capability, and supports full GMRS operation including repeater channels right out of the box. An external antenna installation improves range - a properly mounted antenna makes a significant difference in real-world coverage.
Compared to CB radio installations, GMRS mobile setups are actually simpler because you’re dealing with one unified system rather than the mixed ecosystem of CB bands and vehicle noise issues. We covered the CB side of this decision in depth in our CB radio overlanding gear comparison if you want to understand why more people are moving to GMRS in recent years.
The main limitation of GMRS mobile - even a well-installed one - is infrastructure dependence. In areas with active GMRS repeater networks, your effective range expands enormously, sometimes to 50 or 100 miles depending on repeater placement. In areas without repeater coverage, you’re back to direct line-of-sight performance, which can be quite limited in canyon-heavy terrain. For most National Forest trails, BLM roads, and established overlanding routes, GMRS mobile gives you genuinely useful communication with the people most likely to be nearby. For true remote solo travel - deep desert, remote Alaska, the Bob Marshall Wilderness - you need the next tier.
What to grab at this tier: Radioddity DB20-G plus a quality external antenna for improved range.
Tier Three: Satellite Communicators Under $500
Here’s the uncomfortable truth that experienced solo overlanders eventually accept: no amount of GMRS power solves the problem of being 40 miles from the nearest road in a watershed with no repeater coverage. If something goes wrong with your vehicle - or with you - in genuinely remote terrain, the only communication device that reaches emergency services is one that doesn’t depend on terrestrial infrastructure at all. That means satellite.
The Garmin inReach Mini 2 is the gold standard in this category for overlanders, and it’s earned that reputation through global satellite coverage, two-way messaging capability, and SOS functionality that connects to emergency services 24 hours a day. Unlike one-way personal locator beacons, the inReach Mini 2 allows rescuers to communicate back to you, confirm your situation, and coordinate response.
The form factor matters for overlanders specifically. At 3.5 ounces and roughly the size of a carabiner, the Mini 2 goes in a jacket pocket, clips to a pack, or mounts to a dashboard without consuming meaningful space. The dedicated SOS button requires a deliberate multi-second press to activate, which prevents accidental triggers, but initiates a rescue response the moment you activate it regardless of where on Earth you are. Subscription plans start around $15 per month for basic tracking and limited messages, running to $50 per month for unlimited messaging if you’re doing extended expeditions.
A few things the Mini 2 won’t do: it won’t give you voice communication, it won’t reach other GMRS users, and its text messaging latency means it’s not a substitute for radio contact on a trail. Satellite messages can take 30–90 seconds to route, which is fine for “made camp, all good” check-ins and emergency coordination but useless for “there’s a tree across the trail 50 yards behind me, hold position.” Treat the inReach as your emergency backstop, not your primary communication tool.
If $380 is steep, the standard inReach Mini (first generation) is available used for $150–$200 and uses the same Iridium network with the same SOS functionality. The Mini 2 adds a higher-contrast display, improved battery life, and USB-C charging - nice upgrades, but not critical for safety functionality.
What to grab at this tier: Garmin inReach Mini 2 with an active satellite subscription plan.
How to Layer These Tools
The most effective communication setup for a solo overlander isn’t a single best device - it’s a deliberate layer of tools that cover different scenarios:
Layer 1 — Trail contact: GMRS handheld clipped to your person for immediate use when you’re outside the vehicle. Covers site-to-site communication, trail courtesy calls, and quick contact with nearby users.
Layer 2 — Vehicle communication: GMRS mobile radio on the dash for range, repeater access, and monitoring common trail frequencies (GMRS channel 20 is increasingly used as an informal trail calling channel in many regions).
Layer 3 — Emergency backstop: Garmin inReach Mini 2 mounted to the dash or center console, active and ready. Essential for remote terrain.
The total cost of this three-layer system, starting from scratch, runs $530–$600. That’s not nothing - but compare it to the cost of a helicopter rescue triggered because you couldn’t reach anyone when your transfer case gave out twenty miles from the trailhead. A well-documented SAR operation in remote terrain runs $5,000 to $25,000, and some states bill those costs to the rescued party. The math on communication gear investment is not subtle.
For solo overlanders on a tighter budget, the priority order is: satellite communicator first (the one thing nothing else replaces), GMRS mobile second, GMRS handheld third. If you can only afford one item, make it the one that works everywhere on Earth regardless of what infrastructure exists nearby. See our full rundown on essential overlanding emergency supplies - including how communication fits into your broader preparedness kit - in our guide to essential overlanding safety gear and emergency supplies.
Installing a GMRS Mobile Radio
Setting up a GMRS mobile radio isn’t complicated, but it requires some planning and a bit of 12V work. If you’ve done basic vehicle electrical before, you can handle this in an afternoon. Here’s the step-by-step process:
- Run the power lead to the battery
Run a properly fused power cable (typically 10 AWG for 20-watt radios) directly from the positive terminal of your vehicle battery to the positive input of the main radio body. Use an inline fuse holder placed within 18 inches of the battery, typically rated for 30 amps. Route the cable through the engine bay, then up through the firewall grommet (drill one if necessary) to your interior mounting location. Connect a separate ground wire from the radio’s negative terminal to a good chassis ground point (a bolt on the engine block or frame works well).
- Mount the main radio body
The main radio body itself doesn’t need to be in a convenient location since you’ll be using the detachable control head for operation. Good mounting locations include under the driver’s seat, in a center console, behind the seat, or under a rear seat in a larger vehicle. Use a mounting bracket or adhesive-backed pad to secure it, and ensure adequate ventilation - modern radios dissipate some heat and shouldn’t be covered or trapped against upholstery.
- Mount the detachable control head
Run the microphone/speaker and power cables from the main radio body to a convenient location on your dashboard or upper console where you can reach the microphone and push-to-talk button while driving. Most modern GMRS mobiles ship with a drop-down or bracket-mount control head bracket. Position it so you can operate the radio without taking your eyes off the road for extended periods.
- Route the antenna coax
Run the antenna coax cable from the radio to your external antenna mounting location (roof, roof rack, A-pillar, etc.). Keep runs neat and bundled, avoid sharp bends, and don’t run coax alongside engine block ignition wires or alternator lines that generate RF noise. Once your antenna is mounted and the coax is connected, do a quick test transmission into a known repeater or at a well-attended trail event to ensure you’re getting output.
Total install time for a tidy job is two to four hours if you’re new to this, and 30 minutes to an hour if you’ve done it before.
Antenna Basics for GMRS Mobile
Since antenna choice matters more than most people expect, here’s a practical overview. The antenna that ships with most GMRS mobile radios is a mag-mount or bracket-mounted whip rated for basic operation - functional but not optimized. For a permanent overlanding build, you want an NMO-base antenna mounted to the roof, a roof rack, or an A-pillar mount. NMO is the connector standard used by virtually all serious mobile antenna manufacturers and provides a secure, weather-resistant connection that holds up to washboard roads.
Antenna height matters. The higher the antenna, the more line-of-sight clearance you get over terrain obstacles, the better your range. A rooftop NMO mount on a full-size truck gives you meaningfully better performance than the same antenna mounted to a door panel. Coax quality matters too - use LMR-240 or LMR-400 for permanent runs rather than the generic RG-58 that often ships with budget antenna kits. The FCC’s technical rules for GMRS also limit external antennas to those that don’t increase effective radiated power beyond allowed levels, so stick to antennas marketed for GMRS compliance rather than pulling a ham antenna with unknown gain characteristics.
FAQ: Troubleshooting & Common Questions
Poor radio range even at full power
The most common culprit is antenna placement or coax routing. Make sure your external antenna is mounted as high as possible - rooftop placement is dramatically better than door-panel or hood mounting. Check that coax connections are tight (SMA and UHF connectors can loosen with road vibration), and verify you’re not running coax next to ignition wiring, which generates RF noise and attenuates your signal. If you’re using a mag-mount antenna that ships with many budget kits, upgrade to an NMO-base antenna with quality LMR-240 coax and see if performance improves.
Can’t connect to local repeaters even though the frequency is programmed
Verify you have a valid GMRS license (required to legally access repeaters). Check your radio programming - many repeaters require a specific offset and tone (PL) to be set correctly. If you programmed a repeater frequency manually, confirm the exact frequency, offset, and tone with a local repeater directory (GMRS repeaters are documented at various online databases). Finally, test from a high point or parking lot - repeater access depends on line-of-sight to the repeater antenna, not raw power.
My battery drains too quickly when the radio is on
GMRS mobile radios draw significant current when transmitting (5-20 amps depending on power output) but modest idle current when just monitoring (0.5-1.5 amps). If you’re running the radio while parked and monitoring a channel continuously, plan on 1-2 amps per hour. A 100Ah auxiliary battery can power most GMRS mobiles for a full day of light use. If you’re on a single battery system, make sure you have a battery monitor and understand your actual system capacity before relying on the radio for extended communication.
Do I really need a GMRS license if I’m just doing day trips?
Yes. Operating on GMRS frequencies without a license is a federal violation, and the license costs $35 for ten years. There’s no exam, just a fee. The enforcement risk is real, and more importantly, operating without a license means you can’t legally use repeaters, which is the feature that makes GMRS genuinely useful in mountainous terrain. Get the license. It takes ten minutes at the FCC website.
Can I use my GMRS mobile radio to talk to FRS users?
Yes, partially. GMRS and FRS share eight channels (GMRS channels 1–7 and 15 when operating below 2 watts). Many GMRS mobile radios automatically reduce power on these shared channels for legal compliance. You can monitor and talk to FRS users on those channels, but you won’t reach someone on FRS channels 8–14 from a GMRS radio. In practical terms, most overlanding communication happens on the GMRS-only channels anyway.
Is the Garmin inReach worth the subscription cost?
For solo overlanders running remote terrain, yes - unambiguously. The Freedom plan at roughly $35 per month lets you activate it when you’re traveling and suspend it when you’re not, so you’re not paying year-round for something you use seasonally. The SOS functionality alone justifies the device cost relative to the risk of remote solo travel without any emergency contact capability. Think of it like travel insurance: you hope to never need it, but the cost of needing it and not having it is measured in a very different currency.
What’s the difference between a satellite communicator and a PLB?
A personal locator beacon (PLB) is one-way - it transmits your GPS coordinates to emergency satellites and activates a rescue response, but it can’t receive messages, send status updates, or let you communicate that the situation has changed. A satellite communicator like the inReach Mini 2 is two-way: you can send and receive messages, check in with contacts, and coordinate with rescuers in real time. PLBs are less expensive (no subscription) and have a longer battery life, but for overlanding where your situation can change and communication with rescuers aids extraction, the two-way capability of a satellite communicator is worth the subscription cost.