Best Budget Suspension Spacers vs. Full Lift Kits: Comparison Guide
This post contains affiliate links. As an Amazon Associate, I earn from qualifying purchases at no extra cost to you.
You want more ground clearance for fire roads and trail ruts, but a $2,000 coilover lift isn’t happening this year. The question isn’t whether you need lift - it’s whether a $200 spacer kit gets you trail-ready or leaves you with a nose-high mall crawler that handles worse than stock. Spacers and full lift kits solve different problems, and choosing wrong means either wasting money on a half-measure or overspending on capability you don’t need.
The practical difference comes down to cost, balance, and suspension travel. Spacers sit on top of your existing struts or springs, adding 1.5-3 inches of height for $150-300. Full lift kits replace or modify springs, shocks, and sometimes control arms, costing $600-1,500 but maintaining factory ride geometry. If you’re leveling a truck’s factory rake to fit 33-inch tires and stay on maintained trails, spacers work. If you’re building a rig for articulation over rocks or need rear lift to match a heavy rear bumper and rooftop tent, you need a complete kit.
This guide breaks down the cost-per-capability math, installation complexity, and hidden expenses. Before you order anything, if you’re planning to install a leveling kit, grab a complete socket set, torque wrench, and spring compressor—you’ll need these tools for either option.
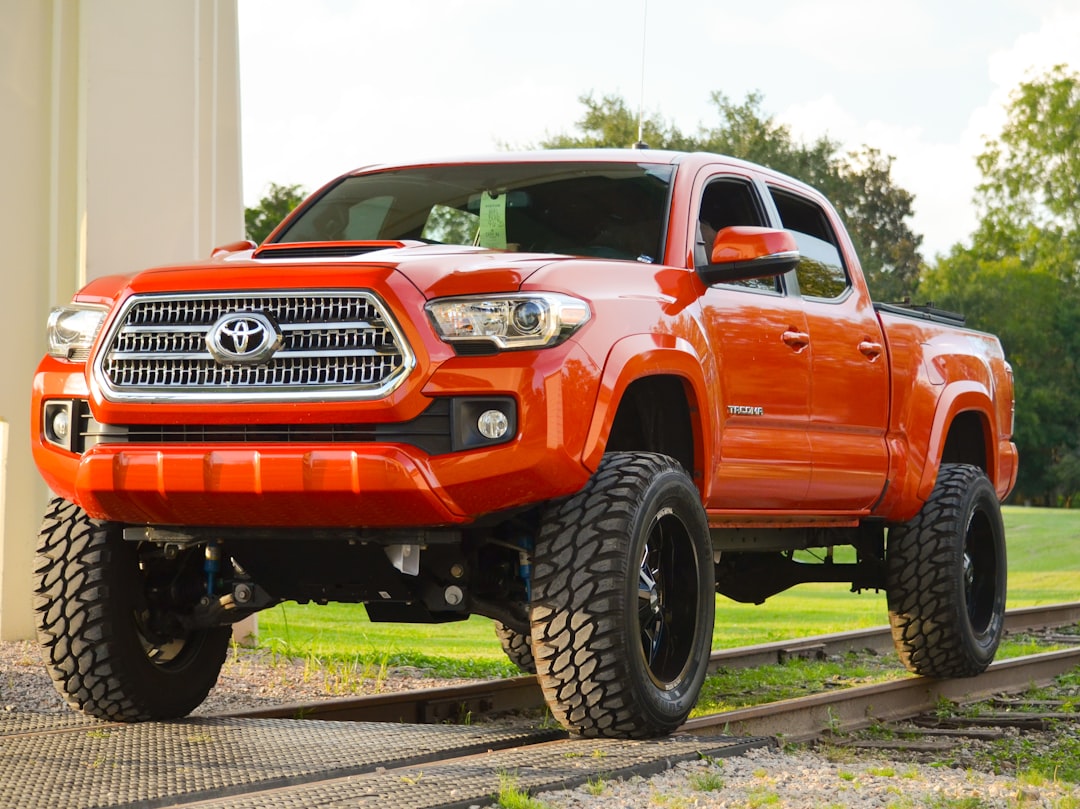
Understanding the Core Difference: Spacers vs. Complete Lift Kits
Suspension spacers are polyurethane or aluminum pucks that sit between your strut assembly and the frame mounting point. They physically raise the body without changing spring rate or shock valving. The Daystar KT09134BK 2.5” lift kit exemplifies this suspension lift approach—engineered components and hardware that provide front lift.
Full lift kits replace or supplement multiple suspension components. A basic kit includes new coil springs or add-a-leaf packs, replacement shocks tuned for the new ride height, and extended brake lines. Premium kits include new upper control arms, adjustable track bars, and sway bar links. The Rough Country 2.5” Suspension Lift Kit with N3 Shocks and Struts includes N3 components, extended brake lines, and hardware to lift both front and rear.
The fundamental trade-off is simplicity versus completeness. Spacers work with your factory suspension - straightforward installation and you keep existing shock valving and spring rates. But spacers typically only lift one end of the vehicle and reduce suspension droop travel by 1-2 inches, which directly impacts articulation over uneven terrain.
Complete lift kits address the entire suspension system. New springs are designed for the correct ride height and load capacity. Shocks are valved and sized to match the new spring rates and extended travel range. Longer brake lines prevent binding when the axle droops. On vehicles with independent front suspension, kits often include correction brackets that restore factory CV axle angles.
The geometry issue matters more than most budget builders realize. When you add 2 inches of spacer lift to a front strut, the upper and lower control arms operate at steeper angles. This changes your camber curve and can make steering feel vague at full droop. A complete lift kit with corrected control arm geometry fixes this, but a spacer-only install leaves you with compromised handling unless you add aftermarket upper control arms later - another $400-600.
For overlanding on fire roads and mild trails, the geometry shift from a 2-inch spacer lift is manageable. For rock crawling or technical trail work where maximum articulation matters, spacers create more problems than they solve.
Cost Breakdown: What You Actually Pay for Each Option
Spacer kits run $150-350 depending on vehicle and lift height. The Supreme Suspensions 2” Front Leveling Kit Strut Spacers is a budget option for half-ton trucks. You’ll need alignment afterward. If your factory shocks are worn, plan on replacement shocks, adding to the total install cost.
Full lift kits start at $600 for basic spring-and-shock packages and run to $1,500 for kits with geometry correction components. Installation labor for a complete kit ranges from $500-1,200 at a shop, compared to $150-300 for spacer installation. DIY time: spacers take 2-4 hours with basic hand tools, while a full kit requires 8-14 hours.
Here’s the actual cash outlay for a typical 2015-2020 Toyota Tacoma:
| Component | Spacer Lift (2”) | Full Lift Kit (2.5”) |
|---|---|---|
| Kit cost | $220 | $950 |
| Alignment | $100 | $120 |
| New shocks (if needed) | $400 | Included |
| Extended brake lines | $0 (not needed) | Included |
| Diff drop brackets | $0 (skipped) | Included |
| Shop install (if not DIY) | $200 | $800 |
| Total (DIY) | $320-720 | $1,070 |
| Total (shop install) | $520-920 | $1,870 |
The cost gap narrows when you factor in components a spacer lift requires to function properly. Full kits include these supporting components, which is why the per-item cost breakdown favors complete systems.
The hidden cost difference appears six months after installation. Spacer lifts on IFS trucks frequently require replacement upper control arms once CV axle wear becomes noticeable - that’s another $400-700. Complete lift kits that include upper control arms or frame-side correction brackets avoid these follow-up costs.
On solid front axle vehicles like Jeep Wranglers, the geometry penalty is less severe, making spacer lifts more viable. This is why spacer lifts are more common in the Jeep aftermarket.
For a budget builder deciding between a $300 spacer lift now and saving for a $1,000 complete kit, the math depends on your current suspension condition and how soon you need clearance. If your shocks are fresh and you’re just leveling for 33s on gravel roads, spacers work. If you’re planning serious trail use or your suspension has 80,000 miles, spending more upfront on a complete kit avoids the double-purchase trap.
Performance Trade-offs: Ride Quality, Articulation, and Durability
Ride quality on spacer lifts depends entirely on factory suspension condition. Since spacers don’t change spring rate or shock valving, a truck with 30,000 miles rides nearly the same after a 2-inch spacer install as it did stock. The primary difference is reduced droop travel—when the suspension extends over a dip, the shock reaches full extension earlier. This creates harsher bottom-out over rough terrain and reduces wheel ground contact on uneven surfaces.
A typical IFS truck has 4-5 inches of droop travel from ride height to full shock extension. A 2-inch spacer reduces this to 2-3 inches unless you install longer shocks. Full lift kits solve this by including shocks sized for the new ride height - a 2.5-inch lift typically uses shocks with 1-1.5 inches of additional stroke length.
Articulation is where spacers fail hardest. Reducing droop travel by 1.5-2 inches cuts your RTI (Ramp Travel Index) score significantly. A truck that scored 450 on a 20-degree ramp in stock form may drop to 380-400 with spacer lift, while a properly designed coil lift maintains or improves the RTI.
Full lift kits include shocks matched to the new spring rate and travel requirements. A Rough Country N3 shock for a 2.5-inch lift has different valving than the factory equivalent—firmer compression damping to control the taller coil spring, and rebound tuning that prevents spring oscillation at the new ride height.
Load capacity is another hidden factor. Adding a rear bumper, tire carrier, and rooftop tent shifts 300-500 pounds to the rear axle. A spacer lift doesn’t address this - you’re still riding on sagging springs. Full lift kits typically include heavier-rate rear springs designed for overlanding loads. Old Man Emu and Icon both publish load ratings showing medium-load springs rated for an additional 300 pounds of constant rear weight.
The durability argument favors complete kits because you’re replacing wear items at the same time you’re adding lift. If you install spacers on a truck with 70,000 miles, you’re lifting aged components into a stressed position. A full kit at 70,000 miles resets the suspension to zero-mile condition with upgraded components.
Installation Complexity and Hidden Costs You Need to Plan For
Installing spacer lifts is mechanically straightforward but requires attention to detail. The process for a typical front strut spacer install:
-
Remove front wheels and access upper strut mounting nuts. Remove plastic engine bay covers to reach the top hat mounting points. These nuts are torqued to 60-80 ft-lbs and often rust-seized. Spray penetrating oil 24 hours before starting.
-
Support the lower control arm and disconnect the strut assembly. Use a floor jack under the lower control arm to compress the spring slightly. Remove the upper strut mount nuts and lower strut-to-knuckle bolts (usually 18mm bolts torqued to 120+ ft-lbs).
-
Install the spacer and reassemble with longer hardware. The spacer sits on top of the strut mount. Most kits include longer studs or bolts. Torque everything to factory spec.
-
Verify brake line slack and check for rubbing. Cycle the suspension through its full range and check that the brake line has adequate slack at full droop.
The critical detail is torque spec compliance. Every suspension fastener has a manufacturer-specified torque value. A lower strut bolt torqued to 80 ft-lbs instead of 120 ft-lbs can work loose under vibration. You need a calibrated torque wrench and the factory service manual.
Full lift kit installation adds complexity. A basic coil spring replacement takes 6-8 hours and requires a spring compressor. IFS kits that include upper control arms add another 2-3 hours for ball joint separation.
Hidden costs start with tools. Spring compressor rental runs $40-60 per day. Ball joint separators and tie rod pullers add another $80-120. Budget $200-300 for specialty tools if you’re starting from a basic socket set.
Alignment is non-negotiable after any lift. Factory alignment specs shift out of range when you raise the suspension. A post-lift alignment costs $80-150. Some lifted trucks require aftermarket alignment cams to bring specs into acceptable range - another $100-200.
Extended brake lines are often overlooked. Factory brake lines are sized for stock suspension travel. A 2.5-inch lift with longer shocks increases droop travel, which can pull the brake line tight at full extension. Extended stainless steel braided lines cost $120-200 for a front pair.
Driveline vibration is the surprise failure mode on IFS trucks with 2.5+ inch lifts. Raising the front suspension steepens the CV axle angle. Beyond 2.5 degrees of additional angle, the CV joint binds and creates vibration at 25-40 mph. The fix is a differential drop kit - $150-300 and 2-3 hours to install.
Common Mistakes When Choosing Between Spacers and Lift Kits
The most expensive mistake is installing spacers as a temporary solution and then upgrading to a full lift kit within a year. You pay for installation labor twice, and none of the spacer components carry over. If your goal is long-term capability, skip spacers entirely and save for the complete kit.
Ignoring vehicle-specific geometry limitations is the second most common error. IFS trucks with torsion bar suspension can crank the torsion bars for lift instead of using spacers, maintaining shock position and CV angles. Installing spacers on a torsion bar truck is almost always the wrong choice.
Leaf spring trucks with adequate factory arch should use add-a-leaf kits instead of spacer blocks. Spacer blocks between the axle and leaf pack create leverage that increases axle wrap under acceleration and braking.
Failing to account for total suspension miles wastes money. If your truck has 90,000 miles and original shocks, they’re worn. Installing a spacer kit on worn shocks gives you a lifted truck that rides poorly. You’ll replace the shocks within six months. The smarter move at high mileage is a complete lift kit that includes new shocks.
Mismatching front and rear lift heights marks inexperienced builds. A 2.5-inch front spacer lift with no rear lift creates a severe nose-high stance. If you’re lifting the front 2 inches to level the factory rake, you need 0.5-1 inch of rear lift to maintain balance - another $150-250.
Skipping the alignment after a spacer install is dangerous and expensive. Driving on misaligned suspension causes uneven tire wear and unpredictable handling. A set of $1,000 all-terrain tires will cup and feather within 10,000 miles if camber is off by 1.5 degrees.
Overlooking brake line and ABS sensor clearance creates failures that strand you. A brake line that clears at ride height may contact the tire at full compression, eventually rupturing the line. Walk around the truck with the suspension cycled through its full range and verify every line and wire has adequate slack.
Safety Considerations and Alignment Requirements
SAFETY WARNING: Suspension modifications directly affect vehicle handling, braking performance, and crashworthiness. Improperly installed lifts can cause loss of control, component failure, and collisions. Always consult manufacturer torque specifications for every fastener. Have your alignment checked by a qualified shop immediately after lifting. Incorrect installation can void vehicle warranties and create liability in the event of an accident. If you are not confident in your mechanical ability or do not have access to proper tools and safety equipment, pay a professional shop to perform the installation.
Lifting your suspension raises the vehicle’s center of gravity, which increases rollover risk. A stock truck with a 24-inch center of gravity height will roll at approximately 1.1 lateral Gs. Adding 2.5 inches of lift reduces the rollover threshold to approximately 1.05 Gs - a 5% reduction in available cornering force. The NHTSA vehicle rollover safety resources document this dynamic extensively for truck owners. This doesn’t mean lifted trucks are unsafe, but your driving style must account for changed dynamics.
Brake performance changes after a lift kit install, especially if you’ve added larger, heavier tires. Increasing tire diameter from 30 inches to 33 inches creates a longer moment arm for braking forces, effectively reducing brake torque by 10%. This translates to longer stopping distances - plan accordingly and leave more following distance.
Alignment specifications after lifting are critical for tire wear and handling. Factory specs for a stock truck are typically 0 to -0.5 degrees camber, 3-5 degrees caster, and 0 to 0.125 inches toe-in per side - specifications documented in the manufacturer’s service manual and by organizations like the Specialty Equipment Market Association (SEMA) lift kit installation guidelines. A 2-inch spacer lift shifts camber toward negative and reduces caster. Negative camber wears the inside edge of the tire, and reduced caster causes steering wander.
A quality alignment shop will measure and adjust to get as close to factory specs as the lifted geometry allows. Achieving factory camber may require aftermarket camber bolts or slotted strut mounts - $80-150 additional. Toe is the easiest spec to adjust and most critical for tire wear. Even 0.25 degrees of toe-out will scrub a tire bald in 15,000 miles.
Steering stabilizers are often marketed as necessary upgrades after lifting, but their role is misunderstood. A steering stabilizer controls oscillation in the steering linkage - it does not fix death wobble or compensate for poor alignment. If your truck develops a shimmy after lifting, the cause is usually worn tie rod ends, loose track bar bolts, or incorrect toe alignment. Fix the root cause first.
FAQ
Can I install a spacer lift now and upgrade to a full lift kit later without wasting money?
You can, but nothing from the spacer install carries over, so you’re paying for labor twice if you’re not doing the work yourself. If you DIY both installs, the waste is limited to the $200-300 spacer kit cost. If you’re paying a shop, you’ll spend $200-300 for spacer installation plus another $600-1,000 for the full lift kit install later. The math only works if the spacer lift serves a genuine interim purpose - like leveling your truck to fit 33-inch tires for this season while you save for a complete suspension overhaul. If your goal from the start is a full lift with front and rear travel, skip the spacer step entirely. The one exception: if your factory shocks are relatively new (under 40,000 miles), you can reuse them with the spacer lift, then sell the used spacers and recover $100-150.
How much lift can I safely add with spacers before I need to upgrade other components?
The safe limit for spacer-only lifts on IFS trucks is 2 inches in the front without additional correction components. Beyond 2 inches, the CV axle angle and control arm geometry shift far enough that you need aftermarket upper control arms to restore proper camber and prevent premature CV joint wear. On solid front axle vehicles like Jeep Wranglers, you can safely run 2.5-3 inches of spacer lift without UCAs because axle geometry doesn’t change - but you’ll need longer shocks to avoid topping out at full droop. The general rule: every inch of lift beyond 2 inches requires another supporting modification. Extended brake lines at 2.5 inches, diff drop brackets at 3 inches on IFS trucks, adjustable track bars at 3 inches on solid axles. If you’re planning 3+ inch lift, a complete kit costs less than piecemealing spacers plus correction parts.
Will a spacer lift or full lift kit void my factory warranty?
Lifting your suspension does not automatically void your entire factory warranty, but it gives the manufacturer grounds to deny warranty claims on related components. Under the Magnuson-Moss Warranty Act, a manufacturer must prove your modification caused the failure before denying a claim - but in practice, they will deny coverage on suspension, steering, driveline, and brake components if you have aftermarket lift parts installed. If your CV axle fails at 35,000 miles on a truck with a spacer lift, the dealer will argue the increased CV angle caused premature wear. Powertrain warranties are less affected - a transmission failure is hard to blame on a suspension lift - but anything in the suspension, steering, or brake systems is at risk. If your truck is under 36,000 miles, consider whether the lift is worth potentially losing coverage on expensive components.
Wrapping Up: Make the Choice That Matches Your Actual Trail Use
Spacers work when you need a level stance for larger tires, your truck has low miles with fresh factory suspension, and your trails stay mild. They cost $300-700 all-in for a quality DIY install and get you 33-inch tire clearance without the complexity of a full suspension overhaul. Full lift kits are the right choice when you need rear lift to balance a loaded truck, want maintained or improved suspension travel for technical terrain, or you’re building on a high-mileage platform that needs new shocks and springs anyway. At $1,000-1,500 for a complete kit, they cost more but solve the entire suspension system in one install.
Neither option is a mistake if it matches your build goals and budget timeline. The mistake is choosing based on initial cost alone without accounting for follow-up expenses. If your trails demand articulation and your truck will carry heavy rear loads, save for the full kit. If you’re leveling a low-mileage truck for mild overland use and can live with reduced droop travel, spacers are a defensible budget choice. Either way, hit the torque specs, get the alignment done, and adjust your driving for the raised center of gravity.
Check out our full comparison of lift kits under $1,500 to see where coilovers and leaf spring upgrades fit in the budget build equation.
Related Reading:
- Best Overlanding Lift Kits Under $1,500: Coilovers vs. Leaf Springs
- Budget Axle and Differential Protection: What’s Worth It
Bookmark this guide for the next time you work through a budget lift decision, and share it with your build group to help them avoid the double-purchase trap. —