Hard-Shell vs. Soft-Shell Rooftop Tents on a Budget
This post contains affiliate links. As an Amazon Associate, I earn from qualifying purchases at no extra cost to you.
Rooftop tents have a reputation for being premium overlanding gear with premium price tags, and browsing the market does nothing to change that perception. Boutique brands will happily sell you a $2,500 clamshell or a $4,000 aluminum wedge. But the budget segment has matured enough that credible options now exist in both hard-shell and soft-shell categories well below those numbers, and that creates a genuine decision problem.
Hard-shell and soft-shell rooftop tents are not the same product at different price points. They have fundamentally different engineering, different weight penalties, different deployment behaviors, and different long-term maintenance profiles. Choosing the wrong type for your camping style or vehicle can mean a tent that punishes your fuel economy, overloads your roof, or frustrates you on every trip because setup takes longer than making dinner.
For most overlanders working with a tight build budget, the right answer depends on how often you break camp within a single trip, what your vehicle’s dynamic roof load rating actually is, and how much total system cost you can absorb once crossbars, mounting hardware, and accessories are included. This guide breaks those factors into concrete criteria and gives you a clear recommendation for each use case.
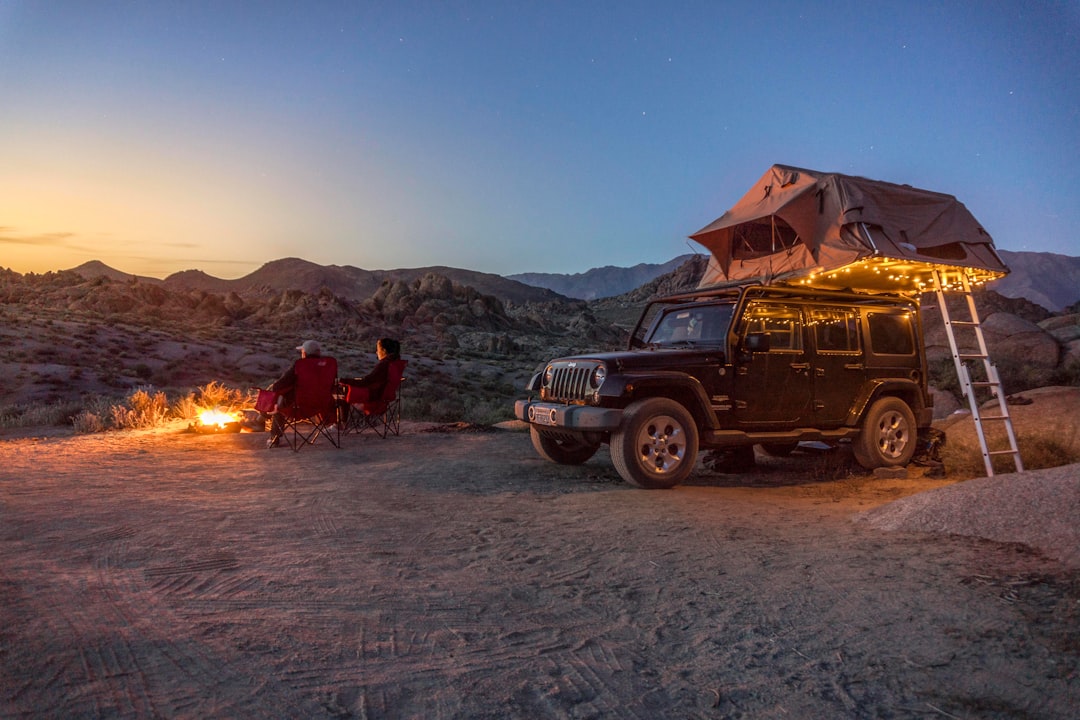
Photo by Stephan Widua on Unsplash
Hard-Shell vs. Soft-Shell Rooftop Tents: What Actually Differs
The core engineering difference is how each tent behaves when closed and stowed on your roof while driving. A soft-shell tent folds flat under a weather-resistant fabric cover, with the poles, fabric, and mattress compressed into a low-profile stack. When you arrive at camp, you remove the cover, unfold the tent body, configure the support poles or spreader bars, and deploy the ladder. Realistically, that process takes 5 to 15 minutes depending on the design and how familiar you are with it.
A hard-shell tent stores inside a rigid clamshell or wedge-shaped housing, typically ABS plastic at the budget tier or aluminum on premium models. Gas struts hold the lid under tension. Opening the tent means releasing one or two latches and letting the strut-assisted lid rise into position, with the sleeping surface already in place. You can be horizontal within 60 to 90 seconds of parking.
That single difference in storage and deployment drives nearly every other comparison point in the category.
Weight: Hard-shell tents run 130 to 180 pounds at the budget tier because of the rigid housing. Comparable soft-shell tents run 80 to 130 pounds. Every pound on your roof raises your center of gravity, reduces your vehicle’s dynamic roof load headroom, and adds rotational weight that affects handling on uneven terrain.
Aerodynamic profile: Hard-shell clamshells present a smooth, consistent surface to moving air when closed. A fabric-covered soft-shell can flutter and generate wind noise at highway speeds, though cover design and strap tension affect this significantly.
Interior space: Fold-out soft-shell designs typically offer more floor area and usable headroom relative to their closed footprint than a clamshell hard-shell at the same purchase price. The fold-out geometry creates interior volume efficiently in ways that a hinged lid cannot always match.
Weather resistance: A rigid housing gives a hard-shell tent better passive protection at the top of the structure. Soft-shell tents rely on fabric quality and zipper integrity for weather resistance, and quality variance at the budget tier is real.
Durability: Rigid housings handle road vibration, UV exposure, and the mechanical stress of highway travel more predictably than fabric covers. That said, a well-maintained soft-shell from a reputable brand will outlast a poorly constructed hard-shell. Construction quality matters more than shell type at the budget end of the market.
Price floor: Credible soft-shell options start under $500. Budget hard-shells rarely appear below $800 for a model with a functional gas-strut mechanism.
Hard-Shell Rooftop Tents on a Budget: Real Costs and Real Tradeoffs
Budget hard-shell rooftop tents occupy the $800 to $1,200 price range. At this tier, the housing is typically ABS plastic rather than aluminum, the integrated mattress is thinner than what premium brands include, and the gas struts use simpler mechanisms that may require adjustment after a season in extreme temperature ranges.
The WildFinder Rooftop Tent, Hard Shell Roof Top Tent for Jeep SUV Truck Van represents this entry-level hard-shell category. It is designed to fit Jeeps, SUVs, trucks, and vans, which covers the majority of the overlanding platform market. The hard-shell design opens for setup and folds back down to a closed shell when not in use.
What you are actually paying for at this price point is the deployment mechanism and the passive weatherproofing a rigid lid provides, not premium sleeping comfort or boutique materials. That is a legitimate tradeoff if fast setup genuinely matters to your camping style.
Before purchasing any budget hard-shell, verify two numbers. The tent’s stated weight comes first. Then check your vehicle owner’s manual for the dynamic roof load rating, which is the constraint that applies while driving. Dynamic ratings are typically 40 to 60 percent lower than static ratings. A mid-size SUV rated for 165 pounds static may carry a dynamic rating of only 80 to 100 pounds. A 150-pound hard-shell tent plus 20 to 25 pounds of crossbar hardware pushes you dangerously close to or over that limit on many common platforms.
Budget hard-shells also tend to include shorter ladders calibrated for stock-height vehicles. If your build includes a 2.5-inch or taller suspension lift, measure your installed vehicle height before finalizing a purchase. Some buyers need aftermarket ladder extensions, which add cost that is invisible in the tent’s initial listing price.
The use case where a budget hard-shell earns its premium over a soft-shell is clear: if you are moving camp every night and setting up and breaking down daily, the time savings are real. Over five nights of nightly setup and morning teardown, recovering 8 to 12 minutes per cycle represents close to two hours over the trip. That is meaningful when you are already fatigued from driving rough terrain.
Soft-Shell Rooftop Tents on a Budget: Where the Value Lives
The soft-shell segment is where the budget RTT market is strongest. The price range is wider, quality benchmarks are more established, and the weight savings over hard-shells give your vehicle’s dynamic roof load rating more margin to work with from day one.
The SmittyBilt Overland GEN2 Tent STD - SB2583 is one of the most consistently referenced budget soft-shell options across overlanding forums and build threads. SmittyBilt has a long track record in off-road accessories, and the GEN2 is an updated iteration of the original design. It is built to fold down to a profile that works with standard roof rack systems.
At the budget soft-shell tier, the most common quality-control concerns are zipper durability and stitching consistency along the cover seams. Searching the model name on overlanding-specific forums will surface owner reports from buyers who have used the tent for multiple seasons, which tells you far more than listing-page reviews that skew toward post-purchase impressions.
Where soft-shells deliver clear value is space per dollar. Many fold-out designs create more usable interior floor area than a clamshell hard-shell at the same purchase price. Annex room accessories are also more commonly offered for soft-shell platforms, which lets you expand your camp footprint without buying a second piece of gear.
REI’s rooftop tent guide notes that soft-shell models remain the dominant segment of the RTT market partly because of this space-per-dollar efficiency, and partly because the folded profile of most soft-shells sits lower on the roof than a closed hard-shell housing, reducing clearance problems in parking structures and on trails with low-hanging branches.
The practical case for a soft-shell on a budget build is strongest when your trips consist of multi-night stays at a single site. Set up once on arrival, break down once on departure, and the 10 to 15 minute setup time becomes a minor inconvenience rather than a genuine friction point. If that describes how you actually camp, the soft-shell is the more defensible financial choice at every price level.
Roof Rack and Crossbar Requirements for Rooftop Tents
Neither tent type works without properly rated crossbars, and the crossbar system is where total project cost most often surprises first-time buyers. A tent with a sticker price of $700 that requires $250 in crossbars and $100 in foot packs is a $1,050 system. Running that math before you commit avoids mid-build budget problems.
The YAKIMA, CoreBar Aerodynamic Crossbars for Roof Rack Systems, Set of 2, Medium (60”) is a reliable middle-ground crossbar option for most budget RTT setups. Before ordering, confirm that the crossbar system is compatible with your vehicle’s make, model, and year. Visit Yakima’s website to run your vehicle through their fit guide. The aerodynamic profile helps reduce wind resistance at highway speeds, which matters if you are covering long distances between trail segments.
Before mounting any rooftop tent, work through this verification sequence in order:
- Find your vehicle’s dynamic roof load rating. This number is in the owner’s manual under specifications. It governs what you can carry safely while driving and is typically 40 to 60 percent lower than the static (parked) rating. Use the dynamic number as your absolute ceiling.
- Weigh or document the crossbar system. Crossbars, foot packs, and mounting hardware all subtract from your available dynamic roof load before the tent goes on. Budget crossbar pairs typically weigh 8 to 15 pounds for the full set.
- Add crossbar system weight plus tent weight, then compare to your dynamic rating. The total must stay below the dynamic ceiling. Build in a 15 to 20 percent safety buffer where possible.
- Confirm the crossbar spread matches the tent’s requirements. Tent manufacturers publish a minimum and maximum crossbar spacing that the base frame is designed to span. Mounting on crossbars spaced too close together concentrates load incorrectly and can create a rocking motion at highway speed; too far apart over-flexes the base frame.
- Torque all mounting hardware to the manufacturer’s specification. Hand-tightening is not adequate for sustained highway loads. Use a torque wrench and recheck the spec after the first 50 miles of highway driving. Loose mounts are a documented cause of tent shift and, in severe cases, tent separation at speed.
This sequence applies to every rooftop tent purchase regardless of shell type. The roof load math does not care whether your tent is ABS plastic or fabric.
Hard-Shell vs. Soft-Shell Rooftop Tent: Side-by-Side Comparison
| Factor | Hard-Shell (Budget Tier) | Soft-Shell (Budget Tier) |
|---|---|---|
| Typical price range | $800 - $1,200 | $450 - $900 |
| Typical tent weight | 130 - 180 lbs | 80 - 130 lbs |
| Setup time | Under 2 minutes | 5 - 15 minutes |
| Closed aerodynamics | Better (rigid shell) | Variable (fabric cover) |
| Weather resistance | Excellent (rigid lid) | Good (quality-dependent) |
| Interior space per dollar | Lower | Higher |
| Cold-weather insulation | Better (rigid panels) | Good with proper bedding |
| Fuel economy penalty | Higher (heavier) | Lower (lighter) |
| Long-term durability | High if shell holds | Medium (zipper and fabric wear) |
| Annex room compatibility | Rare at budget tier | More commonly available |
| Best use case | Daily camp movers | Base campers, multi-night stays |
The table points toward a clean split. The hard-shell is the better tool when camp movement is frequent. The soft-shell is the better financial choice when you establish a base and stay. The weight difference is the lever that influences everything else, from fuel economy to trail-day handling to the roof load math that governs whether your crossbar system is legal and safe.
For most budget-focused overlanders who are new to RTT camping, starting with a quality soft-shell is the more defensible choice. You save $300 to $500 upfront, you reduce roof weight, and you can always upgrade after a season of real use once you know whether setup time is a genuine friction point on your specific trip style.
Common Mistakes to Avoid When Buying a Budget Rooftop Tent
Confusing static and dynamic roof load ratings. This is the most consequential mistake in the RTT purchase process. The static rating is almost always printed more prominently than the dynamic rating on rack marketing materials, and the two are not interchangeable. The static rating applies when your vehicle is parked and not moving. The dynamic rating, which applies while driving, is typically 40 to 60 percent lower. A tent that fits comfortably under the static ceiling can push you past the dynamic limit once crossbar hardware weight is added. Exceeding the dynamic rating increases rollover risk in emergency maneuvers and can cause catastrophic crossbar failure at speed. Always run the math with the dynamic number.
Calculating tent price alone and ignoring total system cost. A $700 tent that needs $280 in crossbars, $80 in foot packs, and $60 in vehicle-specific mounting brackets is a $1,120 system. Budget builds that stall mid-project usually trace back to this step being skipped in the initial planning phase. Before committing to a tent, identify the exact crossbar system your vehicle requires and add the full hardware cost to the total.
Buying based on listing-page reviews instead of forum build reports. Product listing reviews skew heavily toward early impressions. Overlanding communities like Expedition Portal and similar forums contain multi-season owner reports that surface zipper failure rates, gas strut longevity issues, and fabric durability problems that first-month buyers never see. Search the specific model name before buying, not the brand category.
Skipping the crossbar spread measurement. Rooftop tent base frames are designed to span a specific range of crossbar spacings. Mounting a tent on crossbars that are too narrowly spaced creates a pivot point that rocks the tent during highway driving. Too far apart, and the base frame flexes beyond design tolerance. Measure your actual crossbar spread against the tent manufacturer’s stated minimum and maximum before ordering.
Not accounting for ladder reach on a lifted vehicle. A tent’s ladder is calibrated for a stock-height roof. A 2.5-inch suspension lift plus a body spacer plus crossbar height can add 4 to 5 inches above the factory roof level. On many budget tent models, the standard ladder does not reach the ground comfortably from that height, making entry and exit genuinely unsafe. Measure your loaded vehicle’s roof height before purchasing and check it against the tent’s ladder extension length. Aftermarket ladder extensions solve this problem but add cost and installation complexity.
Leaving soft-shell cover straps loose before highway driving. A fabric cover that is not fully cinched can partially open at highway speed, catch air like a sail, and damage the tent fabric or create a road hazard. Before every highway leg, physically walk around the tent and confirm every strap and buckle is fully tightened. This takes 60 seconds and prevents an expensive or dangerous failure.
Frequently Asked Questions
Can I use factory crossbars for a rooftop tent?
Most factory crossbars are not rated for rooftop tent loads, and many are incompatible with RTT mounting hardware. Stock crossbars on common SUVs and trucks often carry load ratings of 100 to 165 pounds, which sounds adequate until you subtract the dynamic load reduction and the weight of the bars themselves. More critically, factory crossbar profiles are frequently round or proprietary shapes that do not accept the T-slot mounting systems most RTT manufacturers use. Before relying on factory bars, verify the dynamic load rating in your owner’s manual, confirm the bar profile accepts RTT mounting hardware, and inspect the foot attachment points for flex or play under lateral load. Purpose-rated aftermarket crossbars are a more reliable foundation and often cost less than buyers expect.
How much will a rooftop tent hurt fuel economy?
Owner-reported data from overlanding forums consistently shows a 1 to 4 MPG reduction at highway speeds, with the larger penalty observed on heavier soft-shell tents with high-profile fabric covers at speeds above 65 mph. Hard-shell clamshells tend to produce a smaller aerodynamic penalty when closed because the smooth rigid housing creates less turbulence than a fabric-covered folded tent. Weight also contributes: a heavier tent requires more engine output to accelerate and maintain speed, which affects economy on varied terrain more than on flat highways. Over a 10,000-mile overlanding season, a consistent 2 MPG difference can add $200 or more in fuel costs depending on your vehicle and local fuel prices.
Is a soft-shell rooftop tent warm enough for winter camping?
A soft-shell tent used with appropriate sleeping equipment handles cold weather effectively, though construction differences between tent types do matter. Hard-shell tents with rigid panel walls lose less heat to drafts than fabric-walled soft-shells, and the clamshell lid eliminates the zipper gaps that can allow cold air penetration on some soft-shell designs. That said, the sleeping bag and insulating pad beneath you contribute far more to overnight warmth than the tent shell type. For cold-weather overlanding, the critical upgrades are a sleeping bag rated 10 to 15 degrees below your expected low, an R-value 4 or higher sleeping pad, and a tent with properly sealing vents to manage condensation. Our guide on winter overlanding and cold-weather camping prep covers the full insulation stack in detail.
The Verdict: Match the Tent to How You Actually Camp
Hard-shell and soft-shell rooftop tents are genuinely different tools, not the same product at different price points. The SmittyBilt Overland GEN2 Tent STD - SB2583 is the stronger recommendation for overlanders who make base camp and stay multiple nights and want a capable soft-shell tent at the budget level. The WildFinder Rooftop Tent, Hard Shell Roof Top Tent for Jeep SUV Truck Van makes sense if you move camp frequently and will rely on the hard-shell design’s setup convenience often enough to justify the choice.
Either way, build the crossbar system first. The YAKIMA CoreBar Aerodynamic Crossbars give you a solid, compatible foundation to start from. Confirm your roof’s load limits using your vehicle’s documentation, budget for the full system cost from the start, and buy the tent type that fits how you actually camp, not how you imagine you might camp someday.
If this breakdown helped you sort out the decision, bookmark it for reference when you are ready to finalize your crossbar and tent combination.
Related Reading
- Winter Overlanding: Cold-Weather Camping Prep on a Budget
- Budget Fridge vs. Cooler: Which Is Worth It for Overlanding