Can You Build a DIY Dual Battery Setup for Under $300?
This post contains affiliate links. As an Amazon Associate, I earn from qualifying purchases at no extra cost to you.
Running a 12V fridge, camp lights, and USB charging off your vehicle’s starting battery is a reliable way to wake up stranded at a remote trailhead. Starting batteries are engineered for exactly one job: delivering a short burst of 400-600 cold cranking amps, then immediately recharging. Discharge one repeatedly through slow, sustained camp loads and you degrade the plates, accelerate sulfation, and permanently reduce capacity. Most SLI batteries fail after 10-20 deep discharge cycles. At 30 weekends per year, that’s a dead battery before the rig’s third season.
A dual battery setup solves this by separating your house loads entirely from your engine-start reserve. Both banks share the alternator’s charge output when the engine runs. When it stops, an isolator disconnects them. You can drain the auxiliary bank down to 20 percent capacity and the starting battery stays completely untouched.
A basic dual-battery system can sometimes come in under $300, but only in the right vehicle with carefully sourced parts. A lithium battery, a required DC-DC charger, professional installation, or higher-current hardware can push the real total well past that figure. Treat $300 as a target to verify from current listings, not a promise. This guide explains the component decisions, charging-path protection, installation sequence, and common mistakes to account for before buying anything.
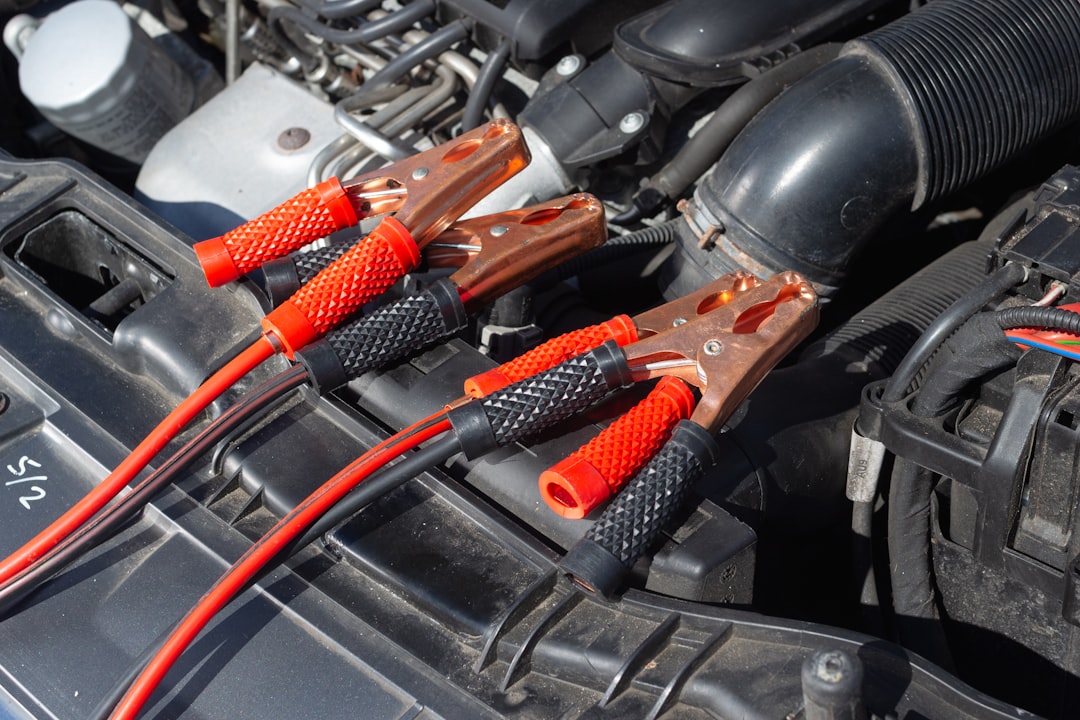
Photo by Daniel @ bestjumpstarterreview.com on Unsplash
Why a Dual Battery Setup Matters for Overlanders
Car camping at a developed site with hookups is a forgiving environment. Remote overlanding is not. A dead starting battery 40 miles down an unmaintained dirt road in July heat is not a minor inconvenience - it’s a recovery situation that can become a serious safety problem. A dual battery system removes that failure mode.
Your factory battery is a starting, lighting, and ignition (SLI) unit. Its plates are thin and optimized for high peak current over a two-second cranking event, followed by immediate recharge. Run it through repeated deep discharge cycles and sulfation builds on the plates, cutting capacity and cold cranking amps permanently. That damage is not reversible.
Deep-cycle batteries have a fundamentally different internal construction. Thicker plates tolerate slow, sustained discharge down to 20-50 percent state of charge without degrading on the same timescale. A dual battery setup lets each battery do what it was actually built to do.
The system logic is straightforward:
- Your starting battery cranks the engine and stays at or near full charge
- Your auxiliary battery runs all camp loads: fridge, lights, USB, inverter
- A voltage-sensitive relay (VSR) or DC-DC charger connects the banks when the alternator is running and isolates them when the engine is off
For a typical overlanding load - a 40-60 liter compressor fridge averaging 4-7 amps, LED camp lights at 2-4 amps, and USB charging at 1-2 amps - total draw runs 7-13 amps continuous. A 100Ah auxiliary battery has substantial usable capacity when discharged to a safe depth, covering a full night at camp without touching the engine or the starting reserve.
What You Need and When a $300 Target Is Realistic
The auxiliary battery accounts for most of the budget. The remaining hardware - isolator relay, cable, fuse, and connectors - can be sourced for $50-80 if you buy deliberately rather than defaulting to whatever is on the parts store shelf.
| Component | Role in the System | Estimated Cost |
|---|---|---|
| 100Ah LiFePO4 auxiliary battery | Stores your camp power | See current listings |
| VSR or isolator relay | Separates banks when engine is off | Low |
| 4 AWG welding cable (12-15 ft) | Main positive and negative runs | Low |
| 150A ANL fuse + holder | Protects the main cable | Low |
| Optional SB50 connector on a separately fused branch | Disconnect for a branch rated at 50A or less | Low |
| Battery tray or mounting bracket | Keeps battery from shifting | Low |
| Ring terminals, heat shrink, misc | Proper terminations | Low |
| Total | Budget-friendly build |
Add current prices for every row before purchasing. A simple AGM-and-VSR build for a compatible fixed-voltage alternator may fit below $300. A lithium build or any vehicle that needs a DC-DC charger often will not. Battery price is the largest variable, but adequately rated protection, cable, terminals, and mounting hardware are not safe places to force a lower total.
For the auxiliary battery, the 12V 100Ah LiFePO4 Battery, Group 24 Deep Cycle RV/Trolling Motor Battery is one Group 24-sized option to compare. Confirm its dimensions, allowable mounting environment, temperature limits, battery-management-system limits, and required charging profile against your vehicle and enclosure before buying. A Group 24 footprint alone does not make a lithium battery suitable for underhood heat or below-freezing charging.
For optional quick-disconnect hardware, the RED WOLF 50A Battery Quick Connector 6-12 AWG Jumper Cable Plug Flame-Retardant Anderson Type SB50 Plug may suit a separately fused branch that never exceeds the connector’s 50A rating and uses a supported wire gauge. Do not splice a 50A connector into a main charging cable protected only by a 150A fuse. The fuse protecting any branch must be sized no higher than the lowest-rated wire, connector, or device in that branch.
Keep the NOCO Boost GB20 500A UltraSafe Jump Starter in the rig even after the dual battery system is installed. A failed isolator, a wiring fault, or an unlikely scenario that drains both banks puts you in a situation the dual battery system cannot solve. It’s your emergency recovery layer, not a substitute for the main system.
Choosing Your Auxiliary Battery: LiFePO4 vs. AGM
Battery chemistry is where the most consequential budget decision lives. The temptation is always to buy a cheap AGM and save $80-100 upfront. Whether that math works depends almost entirely on how often you overland.
Flooded lead-acid (FLA): Cheapest upfront, heaviest, and requires ventilation to exhaust hydrogen gas during charging. Must remain upright. Expect 200-300 cycles at 50 percent depth of discharge. Adequate for very infrequent use, but the ventilation requirement rules it out for sealed enclosures and most in-cab or enclosed cargo positions.
AGM (absorbed glass mat): Sealed, spillproof, mountable in any orientation. Cycle life at typical depth of discharge is limited compared to lithium alternatives. A 100Ah AGM has a lower upfront cost, which looks attractive until you consider the weight penalty and the reduced usable capacity. Pulling an AGM below 50 percent DoD regularly shortens its life significantly, so you’re realistically working with 50Ah of usable capacity from a 100Ah AGM.
LiFePO4 (lithium iron phosphate): Higher upfront cost, but cycle life at high depth of discharge represents a completely different tier of longevity compared to AGM. A 100Ah LiFePO4 safely discharges deeper than a comparable AGM, giving you significantly more usable capacity from the same nominal rating. Weight is substantially lower than a comparable AGM. The voltage curve is also flatter, meaning your fridge and other sensitive devices see stable voltage until the battery is nearly depleted rather than a sagging voltage as the bank gets low. Battery University’s lithium battery summary data documents the cycle life advantage in detail.
The practical recommendation: If you overland more than 15-20 days per year, LiFePO4 wins on total cost of ownership within three to four years. If you go out six to ten times a year, a quality AGM is defensible and frees up budget for other gear. Do not mix chemistries in a parallel configuration - more on that in the FAQ section.
One important compatibility note: LiFePO4 batteries have specific charging requirements. A VSR is a switch, not a charger, and does not create a lithium charging profile. Use a relay-only arrangement only when the battery manufacturer confirms compatibility with the vehicle’s regulated alternator voltage and available charge current. Otherwise use a current-limited DC-DC charger with the correct lithium profile. Check the battery, alternator, and charger documentation together before purchasing.
How to Wire Your Dual Battery Setup: Step-by-Step Install
Safety warning: Automotive electrical work carries real risks including arc flash, fire, and serious burns. Disconnect the negative terminal of your starting battery before beginning any wiring work. If your vehicle has a smart or variable-voltage alternator - common on post-2015 vehicles with start-stop systems, EcoBoost engines, active fuel management, or most European platforms - do not use a standard VSR. These alternators deliberately reduce output voltage at cruise to improve fuel economy, which causes a standard VSR to disconnect the auxiliary bank mid-drive. A DC-DC battery-to-battery charger is required for these vehicles. Confirm your alternator type in the factory service manual before specifying your isolator.
What you need before starting: cable sized for the maximum charging current, total circuit length, installation temperature, and insulation rating; overcurrent protection at each battery-fed end of the positive cable; a VSR or DC-DC charger selected from the battery and vehicle manufacturers’ requirements; a crimp tool and terminals matched to the cable and studs; and adhesive-lined heat-shrink tubing. Treat a 50A SB50 connector as an optional component for a separately fused branch, not as a connector for the main charging cable.
-
Plan your layout and measure wire runs. Decide where the auxiliary battery will live - common locations include a secondary engine bay tray, a cargo-area battery box, or a truck bed box. Measure wire runs from the auxiliary battery positive to the VSR, from the VSR to the starting battery positive, and from the auxiliary battery negative to the chassis ground point. Add 15 percent to each measurement for routing. For 4 AWG wire, keep total run length under 15 feet for up to 50A continuous load. Longer runs or higher sustained loads require 2 AWG.
-
Mount the auxiliary battery and overcurrent protection. Secure the battery tray to a structural surface using suitable vehicle-rated hardware, not to thin sheet metal alone. Confirm the battery cannot shift under hard braking or off-camber trail conditions. Protect the positive cable close to every battery terminal capable of energizing it; in a two-battery circuit this commonly means protection near both positive terminals. Follow the fuse or breaker manufacturer’s placement guidance, and leave the circuit open until the complete installation is inspected.
-
Mount the VSR and make the primary connections. Install the voltage-sensitive relay in a dry, ventilated location away from direct heat sources. Connect the VSR’s primary terminal to the starting battery positive (through the ANL fuse holder). Connect the VSR’s secondary terminal to the auxiliary battery positive. Standard VSRs engage at 13.2-13.7V when the alternator is running and disconnect below 12.7-12.8V when the engine is off. Confirm your relay’s engagement thresholds in its datasheet. Blue Sea Systems’ technical resources cover voltage threshold logic and wire ampacity in detail that translates directly to 12V automotive and overlanding applications.
-
Ground the auxiliary battery. Use the grounding method specified by the vehicle and charging-device manufacturers. That may be a dedicated, properly prepared chassis point or a direct negative return, especially where current-monitoring sensors are involved. Keep the connection clean, protected from corrosion, and sized for the same maximum current as the positive path.
-
Add an optional quick-disconnect branch. If you need a removable accessory or service connection, place the RED WOLF SB50 on a branch whose expected current is 50A or less and whose fuse is no larger than the rating of its weakest component. Use only wire gauges supported by the connector contacts and orient the housings consistently. Do not install this 50A connector in the main alternator-to-auxiliary-battery charging path described elsewhere in this guide.
-
Complete the circuit and test. With all terminations inspected, insert the ANL fuse cartridge and reconnect the starting battery negative. Start the engine and measure voltage at the auxiliary battery terminals with a digital multimeter. You should see 13.5-14.4V, confirming the VSR has engaged and the alternator is charging. With the engine off and a five-minute wait for surface charge to dissipate, resting voltage should read 12.6-13.4V on a recently charged battery. Connect a known camp load and confirm the circuit holds steady. Check every terminal connection for heat after 10-15 minutes under load. Warm is expected; hot indicates a high-resistance joint that requires retermination before the system is put into service.
Charging Your Auxiliary Battery on the Trail
The alternator handles charging while you drive, but on multi-day static camps where you spend more time sitting still than moving, you need a supplemental source. Idling the engine for an hour each morning burns fuel and runtime hours, and it’s the kind of compromise that makes remote overlanding feel like a chore.
A portable solar panel paired with a quality MPPT charge controller is the cleanest solution. A 100W panel delivers 5-7A in real-world conditions on a clear day, which offsets most moderate camp loads and keeps the auxiliary bank stable without touching the engine. A 200W setup generates a meaningful surplus that recovers overnight discharge within a few hours of morning sun. Solar output wires to the MPPT controller’s output terminals, which connect directly to the auxiliary battery - not to the starting battery, and not upstream of the VSR. For a detailed look at portable panel options at budget price points, see the guide on best budget portable solar panels for overlanding.
Shore power is an option at developed campgrounds or home charging. A proper multi-stage 12V battery charger (not a trickle charger) conditions both banks and is worth having for pretrip prep and extended storage. Budget $40-80 for a 10-15A unit if you want to add this to the system later.
The NOCO GB20 jump starter is not a charge strategy replacement. Its role in this build is strictly emergency recovery - if the system fails in a scenario that drains the starting battery, the GB20 recovers you without waiting for another vehicle. Keep it charged and stored separately from the main system.
Common Mistakes That Ruin Dual Battery Setups
Undersized wire. This is the most common and most consequential error in DIY 12V builds. Wire that is too small for the sustained load heats up under use, causing insulation damage, voltage drop, and fire risk. For runs carrying 30-50 amps at 12V, 4 AWG is the minimum for distances up to 15 feet. Longer runs or higher loads require 2 AWG. Fine-strand welding cable or marine-grade battery cable is the correct material - it is rated for the flex, vibration, and heat cycles of a vehicle environment. Hardware-store wire and standard automotive primary wire are not appropriate for the main battery runs.
Missing or oversized overcurrent protection. Every positive cable run from a battery can carry enough fault current to start a fire if it contacts chassis metal. Protect each battery-fed end close to the source, following component and vehicle guidance. Size protection no higher than the ampacity of the smallest wire, connector, or device downstream; cable gauge alone is not enough because insulation rating, routing, ambient temperature, bundling, and terminal ratings also matter.
Using a standard VSR on a smart alternator. Vehicles with start-stop systems, variable-displacement engines, or most post-2015 fuel-economy-focused platforms often run alternators that deliberately drop output to 12.8-13.2V at steady cruise. A standard VSR reads this as the engine being off and disconnects the auxiliary bank mid-drive. The auxiliary battery never fully charges. For these vehicles, only a DC-DC battery-to-battery charger works reliably. DC-DC chargers cost more but actively manage both input and output regardless of alternator behavior.
Poor chassis grounds. Grounding the auxiliary battery to a painted surface, a rusty stud, or a bolt shared with five other circuits creates resistance that causes voltage drop and mysterious intermittent faults. Use a dedicated ground point on a clean frame rail with proper ring terminals and a torqued fastener. Run separate grounds for the starting and auxiliary banks.
Uncrimped or hand-pressed terminals. A ring terminal pushed onto a wire without a proper ratcheting crimp is not a secure electrical connection. Under vibration and load cycling, it will loosen and arc. Crimp all terminals with a ratcheting crimper, not pliers, and seal with adhesive heat shrink. Loose or corroded terminals account for a large share of the “mysterious electrical problems” reported in forum threads about self-built systems.
Not securing the battery. A LiFePO4 battery in an unsecured tray is a projectile in a collision or hard off-camber situation. Mount the battery to structural material with grade-5 hardware and use proper hold-downs or a battery box with a positive latch. This is a safety requirement, not a finishing touch.
Assuming the alternator fully charges the auxiliary bank on a short drive. A deeply discharged 100Ah LiFePO4 may require several hours of driving to reach full state of charge via the alternator through a VSR. On a one-night trip with a short drive in, that bank will not be fully recovered by morning. Plan your energy budget around realistic driving time and supplement with solar if your camp loads are high or your drives are short.
Frequently Asked Questions
Does my vehicle need a DC-DC charger instead of a VSR?
Vehicles with start-stop or variable-voltage charging often need a DC-DC charger, but model year or vehicle category alone is not enough to decide. Smart alternators vary output intentionally, which can make a standard VSR charge inconsistently. Check the factory service information and the auxiliary-battery manufacturer’s requirements before purchasing. A conventional fixed-voltage system may support a VSR when its voltage and available current are compatible; otherwise use a current-limited DC-DC charger. That added hardware can move the build beyond a $300 target.
How long will a 100Ah LiFePO4 battery run a 12V compressor fridge?
A 40-60 liter compressor fridge draws 4-7 amps on average, accounting for the compressor’s on-off duty cycle. The usable capacity of a 100Ah battery discharged to a safe minimum depth provides substantial runtime for overnight camp use. Hot ambient temperatures push the duty cycle higher and reduce runtime. Cool nights extend it. A single driving day with a functioning VSR typically restores meaningful capacity depending on alternator output and driving time, meaning a 100Ah bank handles a multi-day trip comfortably when paired with even a few hours of daily driving.
Can I just wire two batteries in parallel instead of using an isolator?
You can, but it defeats the entire purpose of the build. Batteries in parallel with no isolation form a single shared bank. Drain it running camp gear and you have also drained your starting reserve - the exact failure mode the dual battery system is designed to prevent. There is also a chemistry compatibility problem: parallel batteries should be matched in chemistry, capacity, and age. Connecting a new LiFePO4 in parallel with an older AGM causes the healthier battery to compensate for the weaker one’s reduced capacity, stressing both and shortening service life. An isolator relay is a low-cost addition that solves both problems and is the minimum viable design for a properly functioning dual battery system.
Conclusion
A dual-battery setup can meet a $300 target only when current component prices and the vehicle’s charging requirements allow it. Do not substitute an undersized connector, omit source protection, or use an incompatible relay to force the number. The decisions that determine whether the system works safely are battery and mounting compatibility, charging-device selection, maximum-current calculations, protection at each source, and wire and connector ratings across the entire path.
Start by installing the battery, VSR, and fusing. Verify the system charges correctly under a running engine. Then add solar for multi-day static camps where driving time is limited. For the same wire sizing and fusing logic applied to lighting circuits, the guide on how to wire auxiliary lights without hacking the factory harness covers the same principles and is worth reading alongside this one before you start pulling wire.
If this guide helped you plan your build, bookmark it for reference during your install and drop a comment below with any questions on component selection or fitment for your specific rig.
Related Reading
- Best Budget Portable Solar Panels for Overlanding - pair a portable solar setup with your new auxiliary battery for true off-grid capability on multi-day static camps
- How to Wire Auxiliary Lights Without Hacking the Factory Harness - the wire sizing, fusing, and termination principles in this guide apply directly to every 12V circuit you add to your rig