Best auxiliary lighting and LED headlight kits under 400 for off-road night driving
This post contains affiliate links. As an Amazon Associate, I earn from qualifying purchases at no extra cost to you.
Most stock headlights are designed for pavement. They throw a tidy, legally constrained pattern that works at highway speed and falls apart the moment the road turns to washboard, switchbacks, or a creek crossing at 10 p.m. The result is a familiar trail problem: you can see the next 100 feet fine, but you cannot see the rut beside the tire, the rock outside the beam, or the turn you are about to miss.
The fix is not a single magic light. For most budget builds, the best use of $400 is a pair of quality auxiliary lights, mounted and wired properly, plus a headlight bulb upgrade only if your housings can handle it. A bar or pod set that costs less than a tire but lights the trail wide and close will do more for night safety than any single headlight swap.
This guide covers how to match beam patterns to your terrain, how three specific candidate products fit a $400 ceiling, when LED headlight kits help and when they backfire, and how to wire everything without creating a fire hazard. I will tell you where I would spend first and where I would not.
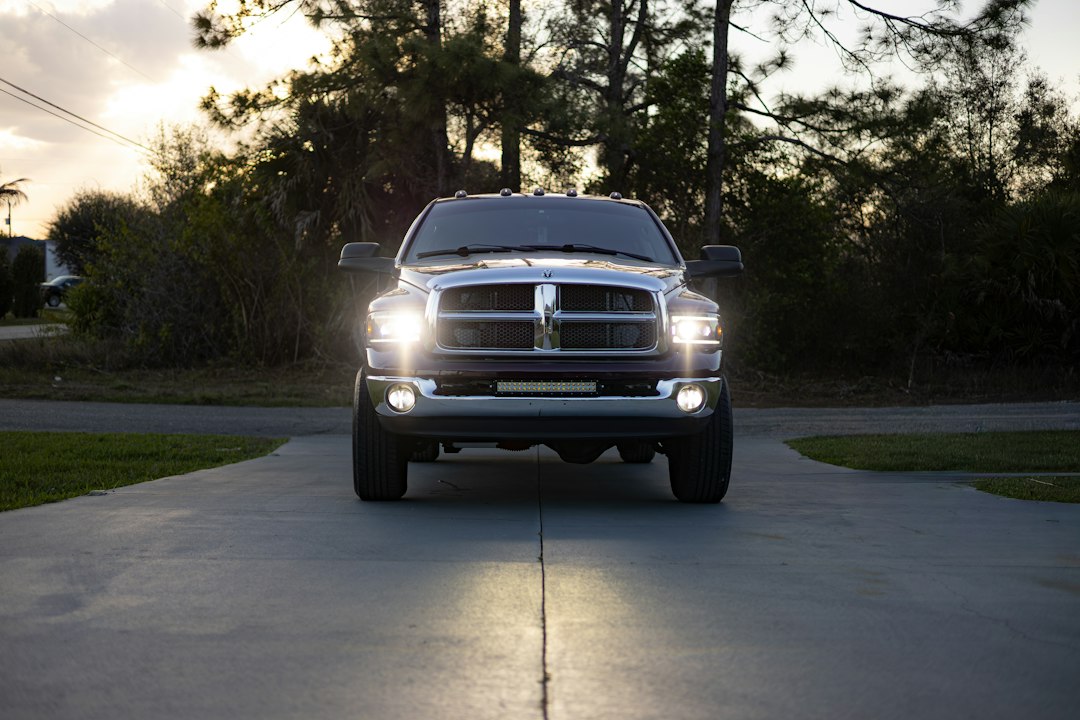
Photo by Landon Liedtke on Unsplash
Why auxiliary lighting beats a headlight swap for most off-road night driving
If you can only fix one thing, fix the lighting you add, not the lighting you replace. Auxiliary lighting is any light mounted in addition to your factory headlamps: pods on the bumper, a bar behind the grille, ditch lights on the hood hinges or A-pillars, or fog-position lights. Its advantage is that you choose the beam pattern, the aim, and the mounting location, rather than inheriting whatever your reflector or projector housing was built to do.
Factory headlights are also bound by federal rules. Federal Motor Vehicle Safety Standard 108, published in the eCFR, governs how road-legal headlamps must perform, including glare limits and cutoff behavior. That is a good thing on a two-lane highway with oncoming traffic. It also means your stock low beam is purposely restrained, and no replacement bulb changes the housing geometry that sets the pattern.
Auxiliary lights sidestep that tradeoff because they are generally intended for off-road use only, and you switch them off when other traffic is around. Local rules vary, and many states require covers or restrict use on public roads, so check your state’s vehicle code before you wire anything to a dash switch.
There are three practical reasons to start with auxiliary lights:
- Placement. Lights mounted low on a bumper illuminate the trail surface and ruts. Lights mounted high on the roof or windshield line reach farther but create glare in dust and fog.
- Pattern control. You can pair a wide flood for close-in visibility with a driving or combo beam for distance, instead of getting one compromise pattern.
- Redundancy. If one headlight fails on a remote trail, a second light source is more than a convenience. It is a safety margin.
For a broader look at how budget lights stack up across price tiers, the comparison in Best Budget Overland Lighting Compared: Affordable Lights That Perform pairs well with this guide.
Choosing the right beam pattern for your terrain
Beam pattern matters more than raw output. Manufacturers often publish lumen figures, but lumens only tell you how much light leaves the emitter, not where it lands. A spot beam that throws 1,000 feet is useless on a tight, wooded two-track, and a wide flood is wasted on open desert fire roads where your speed is higher and your sight lines are long.
Spot, driving, combo, and flood
A spot beam concentrates light into a narrow, long-reaching column. It suits fast, open terrain such as desert washes and graded fire roads, where you need to read the road well ahead. A driving pattern spreads wider and trades some reach for shoulder coverage. A combo beam blends the two, usually with a center hot spot and a modest spread. A flood pattern lights a broad, short area and is the best choice for slow technical work, camp tasks, and tight trees.
For most budget overlanders, a combo or driving pattern up front plus a flood on the sides or at the bumper covers the widest range of conditions. If you buy only one pair, pick the pattern that matches the roads you actually drive most, not the one that sounds most impressive on the box.
Match the pattern to your speed
A practical rule of thumb is to match your beam reach to your stopping distance on the surface you are driving. On loose gravel, stopping distances stretch dramatically, so a driving or combo beam that shows obstacles early is valuable. At crawling speeds on rocky terrain, a flood that shows the whole tire path and both sidewalls matters more than distance.
Mounting height and glare
Mount height changes how dust and fog behave. Higher lights reflect off airborne particles directly back at your eyes, which is why many trail drivers favor low bumper mounting for fog and dust. If you drive in dusty conditions, the lower-mount approach and a flood or fog-style beam usually produce less veiling glare than a high-mounted spot. You can read more on keeping dust out of your intake in Protecting Your Engine From Dust and Debris on Remote Trails.
The three candidate auxiliary lighting kits, compared against a $400 budget
The three products below are candidates, not endorsements based on personal testing. Prices change often and premium-brand pairs can sit near or above a $400 cap, so check the current listing price before you commit. Everything here is drawn from manufacturer descriptions, listing names, and general product-category knowledge.
Baja Designs Squadron-R 2.0 Pro (driving/combo pair)
The Baja Designs Squadron-R 2.0 Pro LED Light Pod Pair, Driving/Combo, Clear is a pod pair for off-road lighting. According to the listing, it is a driving/combo pattern. The main appeal of a compact pod pair is flexibility: depending on your vehicle and hardware, you can consider a range of mounting locations.
The tradeoff is that compact pods are a different kind of light than a large light bar, so think about the visibility you actually need. If your budget is tight, this is the pick when you want a compact pair. Verify the current price and what is included in the box, since mounting hardware and wiring can differ. You can review the manufacturer’s current offerings at Baja Designs.
KC HiLiTES Flex ERA 4 two-light master kit
The KC HiLiTES Flex ERA 4-2-Light Master Kit (289) is a multi-light kit rather than a single pair of lights. For a budget builder who has never wired auxiliary lights, a complete kit can remove a major source of mistakes, so check the listing to confirm exactly what is included, including any wiring and switch hardware.
KC is a long-running name in off-road lighting, and the Flex ERA line is designed around a flexible mounting system that suits a range of bumper and bracket setups. The tradeoff is size and price. Larger round lights take more bumper real estate and generally cost more than compact pods, so confirm current pricing against your $400 limit and measure your mounting location before you order. Manufacturer details are available at KC HiLiTES.
Diode Dynamics SL2 Pro LED fog light bulbs (H11, 6000K)
The Diode Dynamics SL2 Pro LED Fog Light Bulbs compatible with H11 bulb size (pair), Cool White (6000K) is different from the other two. It is a replacement bulb for vehicles that use an H11 fog light bulb size, not a standalone auxiliary light. If your truck or SUV has factory fog lights that take an H11 bulb, this is a simple way to upgrade your fog lighting without adding separate auxiliary lights.
The catch is compatibility. The bulb only helps if your fog housing and bulb size match, and the result depends on how well the LED emitter pattern fits the reflector or projector. Confirm the bulb size for your exact year, make, and model before ordering.
Side-by-side comparison
| Option | Type | Best for | Wiring needed | Main tradeoff |
|---|---|---|---|---|
| Baja Designs Squadron-R 2.0 Pro | Pod pair, driving/combo | General trail use, flexible mounting | Verify what the listing includes | Compact pods are not a large light bar |
| KC HiLiTES Flex ERA 4-2-Light Master Kit | Multi-light kit | First-time installers wanting a multi-light setup | Verify what the listing includes | Check listing for size and what is included |
| Diode Dynamics SL2 Pro H11 | Fog bulb replacement | Vehicles with H11 fog bulb sockets | Bulb swap; confirm fitment | Only works with compatible H11 fog lights |
My ranking for most budget builders: the KC master kit if you want a multi-light setup, the Baja Designs pods if you value a compact pair, and the Diode Dynamics bulbs only if your vehicle already has H11 fog lights and you want a simple bulb upgrade.
LED headlight kits: when a bulb swap helps and when it backfires
Search results for LED headlight kits are full of promises about brighter, whiter light for $50. Some of that is true, but there is a catch. Putting an LED bulb into a housing designed for a halogen filament often scatters light in the wrong places, because the reflector was shaped around the filament’s exact position. The result can be more glare for oncoming drivers and a duller beam pattern where you actually need light.
What actually determines headlight quality
Three factors matter more than the claimed lumen number:
- Housing type. Projector housings usually handle LED bulbs better than reflector housings because the lens and cutoff shield shape the beam more tightly.
- Emitter position. An LED bulb that mimics the filament location produces a cleaner pattern. A poor match creates dark spots and glare.
- Heat management. LEDs fail from heat, so fan or heat-sink design matters, especially in enclosed housings in dusty environments.
Legal and practical limits
Because headlamps fall under the federal lighting standard linked above, many aftermarket LED bulbs are labeled for off-road or show use only. That is worth taking seriously. A bulb that is not intended for on-road headlamp use can cause legal issues at an inspection and glare problems for other drivers. Read the manufacturer’s stated use before installing anything in a low or high beam socket.
My recommendation
Treat a headlight swap as the second step, not the first. If your vehicle has projector headlights and a bulb manufacturer clearly states compatibility with your application, a swap can be a worthwhile upgrade. If you have older reflector housings, spend the same money on auxiliary lighting instead, since an additional light source beats a compromised one.
The fog-position bulb is a lower-risk place to experiment, because fog beams are low and wide by design. That is why the Diode Dynamics option above is easier to justify than a swap in your main headlamp.
Auxiliary lighting wiring and installation, step by step
Safety warning: this is electrical work. Auxiliary lights can draw significant current, and a poorly protected circuit can overheat wire, melt insulation, and start a fire. Disconnect the negative battery terminal before you begin. Install an inline fuse close to the battery, sized to protect the wire, not just the lights. Never run unfused power directly from the battery to a switch inside the cabin. If you are unsure about gauge, relay wiring, or fuse sizing, have a qualified installer do the work. Also check that you have a working fire extinguisher in the vehicle, as covered in Vehicle Fire Extinguisher Guide: What to Carry and Where to Mount It.
Why you need a relay
A relay lets a small switch signal a larger circuit, so the high current runs through heavy wire straight from the battery rather than through your dashboard switch. Most complete kits, including master-style kits, are built around this idea. If a kit ships with a harness, follow the manufacturer’s wiring diagram and wire gauge instructions.
Install steps
- Plan the mounting location. Hold each light in place and confirm it clears the hood, grille, and bumper edges, and that nothing blocks the lens. Mark bracket positions.
- Mount the lights and aim them. Fasten brackets using proper hardware and thread locker where recommended. Aim lights slightly down at first. You will fine-tune aim later.
- Route the harness. Run wires away from heat sources, moving parts, and sharp edges. Use loom or conduit and secure the harness with ties every few inches.
- Connect the relay and fuse. Mount the relay in a protected spot, connect the battery lead through the inline fuse, and connect the ground to clean bare metal or a proper ground point.
- Run the switch wire. Pass the switch lead through a grommet in the firewall rather than through a bare hole. Mount the switch where you can reach it without looking.
- Reconnect and test. Reconnect the battery, test the lights in a dark area, and confirm the fuse and wires stay cool after a few minutes of runtime.
- Aim for the trail. Park on level ground facing a wall at night and adjust the aim so the beam hits the trail surface without blinding anyone. Keep them covered or off on public roads.
If your vehicle’s electrical system is already near its limit because of a fridge, inverter, or other accessories, consider adding a second battery. The guide to a DIY Dual Battery Setup for Overlanders Under 300 Dollars explains how to separate your accessory loads from your starting battery.
Common mistakes and problems to avoid with off-road lighting
A lot of night driving frustration comes from avoidable setup errors, not from the lights themselves. These are the problems that show up repeatedly in forum build threads and installer guidance.
Buying on lumens alone. Marketing numbers are not a measure of usable light. A cheaply made light with a large claimed output can have a messy beam with hot spots and dark gaps. Look for stated beam pattern, lens design, and a clear spec sheet.
Mounting too high. Roof-mounted lights look great but create glare in dust, fog, and rain. If you drive in those conditions, bumper-level lights are often more usable.
Skipping the relay and fuse. Wiring lights straight through a switch is a classic way to melt a switch or start a wiring fire. A relay and a correctly sized fuse are not optional.
Ignoring ground quality. A weak or corroded ground causes flicker, dim output, and heat. Sand to bare metal, use a proper ring terminal, and seal the connection against moisture.
Using cheap LED bulbs in reflector housings. As covered above, this often makes the beam worse. If the pattern turns scattered and glaring, go back to the original bulbs or put the money toward auxiliary lights instead.
Forgetting about legality. Auxiliary lights wired to a dash switch are still lights. Many jurisdictions restrict their use on public roads, require covers, or cap the number of forward lights. Check local rules.
Poor aim. Even the best light is a waste if it points at the sky or straight into the dirt. Spend ten minutes aiming against a wall at night.
No water protection. Connectors on a bumper take a beating from creek crossings and mud. Use sealed connectors, dielectric grease, and weatherproof loom, then review your water crossing prep in Water Crossings: Technique and Vehicle Prep.
FAQ
Are LED headlight kits legal for off-road night driving?
It depends on where you drive and what the product is labeled for. On public roads, headlamps fall under federal lighting standards, and many aftermarket LED bulbs are sold for off-road or show use only. That does not mean they are automatically illegal on private land or trails, but you should not assume they are acceptable for highway use. Read the manufacturer’s stated application, check your state’s vehicle code, and consider running aftermarket lights only off-road, with covers on when you return to pavement. If you need a street-legal headlight upgrade, look for products that explicitly state compliance with the applicable standard for your housing.
How many auxiliary lights do I actually need?
For most budget builds, one pair is enough. A pair of combo or driving lights gives you a solid forward beam, and adding a second set of floods for the sides or bumper is a good next step if you do technical trails. More lights are not always better, because stacking too many in the same spot just adds glare, draws more current, and raises the cost of wiring and fusing. Start with a single pair, learn what you are missing on your own trails, and add a complementary pattern only if you find a real gap in visibility.
Do I need a relay for every set of auxiliary lights?
In nearly every case, yes. Even small pods can draw enough current to stress a typical dash switch when you combine two or more lights, and a relay is a cheap way to protect the switch and wiring. The relay lets a low-current switch trigger a heavier circuit that runs through correctly sized wire and a fuse. Many master kits include a relay harness, which is a major reason beginners prefer them. If your lights ship without a harness, buy a quality relay harness rated for the load rather than improvising with household or thin automotive wire.
Should I upgrade my headlights or add auxiliary lighting first?
Add auxiliary lighting first. A headlight bulb swap changes only the light source inside a housing that was designed around a different bulb, so results vary and can even get worse. Auxiliary lights give you a new, controllable beam in a mounting location you choose, which improves off-road visibility more reliably. After you have auxiliary lights installed, you can evaluate whether a headlight upgrade is still worth it, especially if you have projector housings and a bulb with clear compatibility information for your vehicle. Most budget builders will find the first step solves most of their night-driving complaints.
Conclusion
Spend your first $400 on auxiliary lighting, not on a headlight swap. A pod pair like the Baja Designs pods or a multi-light kit like the KC HiLiTES Flex ERA gives you lighting in addition to your headlights. Use the Diode Dynamics H11 bulbs only if your vehicle already has H11 fog lights and you want a simple bulb upgrade.
Before you buy, confirm current prices against your cap, measure your mounting spot, and decide which beam pattern fits your typical speed and terrain. Then wire it with a relay and correctly sized fuse, aim it against a wall, and test it before your next night trip. Make that your next step this weekend.
If this guide helped, bookmark it for your next build or subscribe through RSS to catch the next budget overlanding breakdown.
Related reading: