DIY interior storage and cargo organization for overlanding vehicles
This post contains affiliate links. As an Amazon Associate, I earn from qualifying purchases at no extra cost to you.
Most overlanding trips go wrong in small ways long before anything breaks. You dig through three bins to find a headlamp, the recovery strap ends up under the cooler, and the water jug slides into the back of your seat on the first washboard stretch. Poor cargo organization costs time, adds frustration, and in a hard stop it becomes a safety problem.
The fix does not require a four-figure drawer system. For most budget builders, DIY interior storage built from plywood, standard storage bins, and a handful of tie-down points beats a pricey kit, because you size it to your vehicle and your gear instead of the other way around. Buy a commercial system only after you know how you actually pack.
This guide covers how to plan your layout, how to stay inside your weight limits, which DIY builds earn their space, and where a premium option like a truck bed drawer system fits. You will also get a step-by-step plywood build and a list of the mistakes that derail most first attempts.
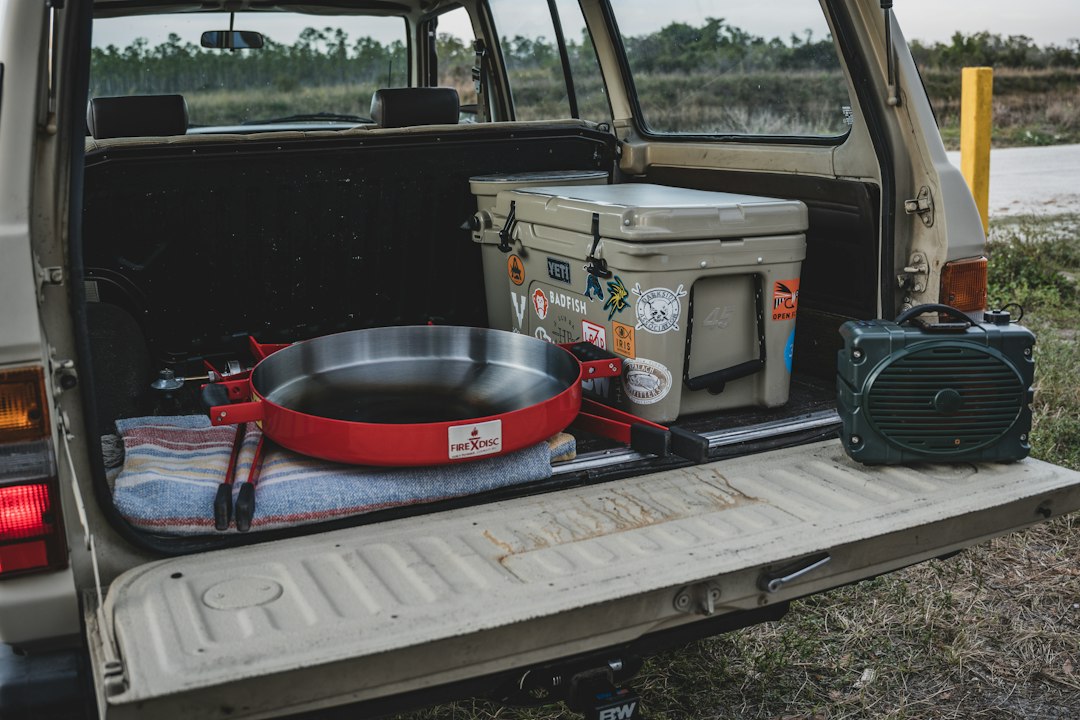
Photo by Chase Baker on Unsplash
Why DIY Interior Storage Beats a Pre-Built System at the Start
The case for building first is simple: you do not yet know your packing habits. A weekend camper who carries a fridge, a stove, and a sleeping setup needs a very different layout than a solo traveler hauling recovery gear, spare fluids, and a week of food. Buying a rigid system before you learn that is how people end up with expensive drawers that waste half their volume.
Building your own storage lets you iterate. Cardboard mockups, cheap bins, and a few ratchet straps will show you within two or three trips which items you reach for constantly and which ones only matter in an emergency. That information is what a good layout is built on.
Cost is the other factor. A sheet of plywood, a few hardware store brackets, and a set of matching bins cost a fraction of most commercial interior systems, and you can pay for them in installments by building one module at a time. If you are already trimming expenses elsewhere, the approach in our guide to reducing overlanding trip costs without cutting corners applies here too: spend where failure is costly, save where a simple solution works.
DIY has real limits. Plywood is heavy, weatherproofing takes effort, and a home-built box will not carry a manufacturer’s crash or load rating. Fabricated systems also tend to be quieter and better sealed against dust. The practical approach is to start DIY, learn your needs, and upgrade only the pieces that frustrate you.
Start With Weight and Payload Before You Build Anything
Every pound of storage hardware eats into the payload your vehicle can legally and safely carry. Plywood boxes, steel brackets, water, recovery gear, a fridge, and passengers all count. Many mid-size SUVs and half-ton trucks have less usable payload than owners assume, and an overbuilt interior can push you over the limit before you add a single camping item.
Find your vehicle’s payload on the driver’s door jamb sticker, which lists the combined weight of occupants and cargo. Then work through a rough budget: passengers, water (a gallon weighs about 8.3 pounds), fuel if you carry extra, fridge and food, recovery gear, tools, and the storage structure itself. Our walkthrough on how to determine payload capacity and safe weight limits for your vehicle shows the full process. The National Highway Traffic Safety Administration also publishes loading guidance in its tire and loading information resources, including how to read the placard.
Safety warning: Loose cargo is a hazard in sudden stops, rollovers, and trail impacts. Heavy items such as water containers, toolboxes, and recovery gear must be strapped to factory anchor points or bolted to the structure, never left free in the cargo area. Do not stack heavy items above the seat-back line. If you carry fuel, propane, or batteries, follow the manufacturer’s mounting and ventilation instructions, and keep a fire extinguisher within reach of the driver. Our vehicle fire extinguisher guide covers placement.
A useful rule is to design your storage around weight first and volume second. Keep dense items low and forward of the rear axle where possible, and place light bulky items (sleeping bags, clothing, camp chairs) high and to the sides. A well-balanced load handles better on loose surfaces and reduces stress on the rear suspension, which matters a great deal if you have not yet upgraded springs or shocks.
Cargo Organization Basics: Zones, Modules, and Access Order
Good cargo organization is a system, not a collection of containers. The simplest framework divides your vehicle into zones based on how often you need each item, and then builds modules to fit each zone.
The Three Access Zones
Zone 1: Immediate access. Items you need while driving or within seconds of stopping: first aid kit, headlamp, water bottle, charging cables, gloves, maps, and the fire extinguisher. These belong in door pockets, seat-back organizers, the center console, or a small bin reachable from the driver’s seat or the tailgate.
Zone 2: Daily access. Things you use at every camp: the kitchen box, cooler or fridge, camp chairs, water, and a toiletries kit. These should sit near the tailgate or a side door so you can pull them out without unloading everything else.
Zone 3: Occasional access. Recovery gear, spare parts, tools, extra fluids, and seasonal gear. These go deepest and lowest, but not so deep that you cannot reach them during a stuck-vehicle emergency. Recovery equipment in particular should never be buried under camp gear. If you are still assembling that kit, see our breakdown of the best recovery gear kit for overlanders on a budget.
Modular Beats Monolithic
A single giant box looks tidy but fails in practice. When one module holds everything, you must lift the whole thing to reach one item, and you cannot repack easily between trips. Smaller, uniform modules can be swapped, moved, and left at home when you do not need them.
Standardize on one or two bin sizes so they stack and slide predictably. Mixed sizes waste space and make strapping harder. The Rubbermaid Cleverstore 17 Qt Clear Storage Bins with Lids, 6 Pack are one option for a modular cargo system built around a single bin size. Clear or labeled lids save time and a strip of tape with a marker beats memory every time. Group by task rather than by object type, so a “kitchen” bin holds the stove, fuel, lighter, pots, and utensils together, and a “recovery” bin holds straps, shackles, gloves, and a tire repair kit together. Task-based grouping means you grab one container and have everything.
Pack in Reverse Order of Need
Load the vehicle as if you are unpacking it backward. What you need last goes in first, and what you need on arrival goes on top or nearest the opening. This sounds obvious, but most disorganized builds ignore it because the owner packed in the order items were found around the house.
Choosing Your Storage Approach
DIY Interior Storage Builds That Earn Their Space
Not every build is worth the effort. These four consistently pay off for budget builders because they use inexpensive materials and solve problems nearly every overlander has.
Plywood Sleeping Platform With Storage Underneath
A raised platform over the rear cargo area creates a flat sleeping surface and a protected storage garage below. It suits SUVs, wagons, and vans, and it works as the foundation for sliding bins. Keep the platform height low enough to preserve headroom for sitting up, and use lightweight 1/2 inch plywood with a supporting frame instead of a full 3/4 inch sheet. The APA, the engineered wood association, publishes guidance on plywood grades and panel use that helps you choose between sheathing and cabinet-grade panels, and tells you which finishes handle moisture.
Sliding Cargo Tray or Drawer
A simple tray on heavy-duty slides lets you pull gear out of the back without crawling in. If you build around Hettich-style drawer slides, a 2 Pack Replacement Drawer Slide Rear Mounting Bracket, Compatible with Hettich Cabinet Drawer is a replacement part to have on hand; note that it is a bracket, not the slides themselves. Check the rated load of whatever slides you choose and then derate it, since off-road vibration is harder on hardware than a kitchen drawer. A basic tray with a plywood base and low side rails can hold a fridge, a kitchen box, or bins, and it can be bolted down with a few bolts into factory cargo anchors or reinforcing plates.
Seat-Back and Door Organizers
Fabric and molded organizers hold the Zone 1 items that otherwise end up rattling in cup holders. They cost little and install in minutes. Look for models with a rigid back panel so they do not sag under weight, and avoid placing heavy items in them. In vehicles with side airbags, never block or modify airbag deployment zones, and check your owner’s manual before mounting anything to a seat or door panel.
Overhead and Wall Netting
Cargo nets, MOLLE-style panels, and mesh pockets turn dead wall space into storage for lightweight items: hats, rain jackets, small tools, and gloves. They are the cheapest upgrade here, but limit them to light items. A loaded net can launch its contents in a collision or hard braking.
Where a Truck Bed Drawer System Fits
If you drive a pickup, the equation shifts. A truck bed is open to the weather, and a bed storage system can address both security and organization at once. The DECKED Truck Bed Storage System for the Chevy Silverado and GMC Sierra 1500 (2019-Current New Body Style/Next Gen, 5’9” bed) is one example, listed as compatible with that truck and bed length, so you can keep tools and recovery gear organized in the bed.
Understand what you are paying for. A system like this is a precise, vehicle-specific product, so it fits the stated bed and model years and nothing else. Confirm your truck’s year, generation, and bed length against the listing before ordering, and review the manufacturer’s stated load ratings for the deck and drawers. It is not a budget purchase, and it does not reduce your payload concerns, since the system itself adds weight.
When does it make sense? It suits owners who already know they will keep the truck for years, who carry tools and recovery gear on every trip, and who value security and dust protection over the lowest possible cost. It also makes sense if you lack the time or workshop to build and finish a custom bed box.
When should you skip it? If you drive an SUV, wagon, or van, it does not apply. If you are still learning how you pack, or you plan to change vehicles within a year or two, spend the money on a DIY approach first. A plywood bed box and a few quality bins cover many of the same needs for far less, and you can always add a commercial system later with a clear idea of what you want.
Comparing Your Options
This table summarizes the main approaches, with cost levels as relative estimates rather than quotes, since material prices vary by region.
| Option | Relative cost | Build difficulty | Best for | Main tradeoff |
|---|---|---|---|---|
| Stackable plastic bins and straps | Low | Very easy | First builds, any vehicle | Not fixed in place unless strapped well |
| Plywood sleeping platform with storage | Low to medium | Moderate | SUVs, wagons, vans | Adds notable weight; limits headroom |
| Sliding cargo tray or drawer | Medium | Moderate | Frequent access to a fridge or kitchen | Slide hardware quality drives cost and reliability |
| Seat-back and door organizers | Low | Very easy | Zone 1 small items | Light loads only |
| Wall netting and panels | Low | Easy | Soft goods, light tools | Can launch items if overloaded |
| Commercial truck bed drawer system | High | Easy to install | Pickup owners keeping the truck long term | Vehicle-specific; highest upfront cost |
The pattern is clear. Start at the top of the table and work down only as your needs justify the added cost. Most budget builders find that bins, one plywood module, and Zone 1 organizers solve ninety percent of their problems.
How to Build a Basic Plywood Cargo Box: Step by Step
This build produces a simple, strappable box that works as a kitchen module, tool box, or recovery bin. Adjust the dimensions to fit your cargo area, and always measure your own vehicle rather than trusting generic numbers.
- Measure and plan. Measure the width between wheel wells, the usable length, and the height under your intended load line. Sketch the box with dimensions and decide how the lid or front will open. Cardboard mockups are cheap and reveal clearance problems before you cut wood.
- Choose materials. Use 1/2 inch plywood for the walls and 3/4 inch for the base if the box will carry heavy items. Plywood with a smooth face takes paint and sealant better. A full 4 by 8 sheet of 3/4 inch plywood often weighs between 60 and 75 pounds depending on species, so factor that into your payload budget.
- Cut the panels. Cut the base, two sides, front, back, and lid to size. Cut slightly oversize if you are unsure, and trim to fit. Sand the edges to prevent splinters and to help finishes adhere.
- Assemble with glue and screws. Apply wood glue to the joints and fasten with screws, pre-drilling to prevent splitting. Add corner blocks or small brackets inside for rigidity. Glue plus screws handles vibration far better than screws alone.
- Seal and finish. Apply two or three coats of sealant or paint, paying close attention to cut edges where moisture enters. A durable finish matters if the box will see condensation, spilled drinks, or wet gear.
- Add hardware. Fit a latch or hasp, a lid stay, and handles. Install tie-down loops or D-rings rated well above the load they will carry, and bolt through the base with washers or backing plates rather than screwing into thin panels.
- Secure it in the vehicle. Strap the finished box to factory anchor points, or bolt it to the vehicle only where the manufacturer’s instructions allow. Load it fully, then tug hard on every strap to confirm nothing shifts. Re-check after the first rough drive.
After your first trip, revisit the layout. Note what you reached for, what you never touched, and what rattled. Adjust dividers and move items between zones accordingly. A good setup is rarely finished on the first pass.
Common Cargo Organization Mistakes to Avoid
These problems appear again and again in forum-documented builds, and most of them are avoidable.
Ignoring payload. The most expensive mistake is building a beautiful, heavy system and then discovering you exceed your limit once passengers and water are aboard. Weigh the structure before you commit, and budget weight for every category of gear.
Burying critical gear. Recovery equipment, first aid, and the fire extinguisher must be reachable in an emergency without unloading the vehicle. If you need to move a cooler to get a shackle, the layout is wrong.
Skipping tie-downs. Gravity and friction do not hold cargo in place on rough trails. Every heavy item needs a mechanical restraint rated for the load. Use quality ratchet straps and hardware instead of cheap, unrated hooks for anything heavy.
Overbuilding on day one. Builders who spend weeks crafting a perfect system often discover their needs changed after a single trip. Build one module at a time and use it before building the next.
Forgetting airflow and moisture. Sealed boxes trap humidity, which breeds mold on damp gear and can corrode tools. Let wet gear dry before storing it, add desiccant packs to tool and electronics bins, and avoid storing food in unsealed containers.
Blocking visibility and safety systems. Tall stacks that obstruct the rear window, or storage that interferes with seat belts, airbags, or cargo-area ventilation, create hazards. Keep sight lines clear and check your owner’s manual before drilling or mounting anything.
Mixing too many container types. A pile of mismatched boxes wastes space and makes strapping awkward. Standardize on one or two sizes, label them, and keep a short written packing list.
Ignoring noise. Rattles are not just annoying; they signal movement that eventually wears hardware and drives you crazy over a long day. Add foam or rubber padding at contact points, and tighten hardware after the first few trips.
FAQ
How do I organize cargo in an SUV for overlanding?
Divide the cargo area into access zones and match modules to each. Keep emergency and daily-use items near the tailgate or side doors, put dense items low and forward, and strap everything to factory anchor points. Use uniform bins grouped by task, such as kitchen, recovery, and tools, so you can pull one container instead of unpacking the vehicle. A plywood platform with a storage garage underneath adds a flat sleeping surface and protects gear. Weigh your finished setup against your payload sticker, because storage hardware adds weight that many first-time builders overlook. Revisit the layout after every trip until it stabilizes.
Is a DIY storage setup safe for off-road use?
It can be, provided you build and secure it properly. The main risks are unsecured cargo, overloaded hardware, and exceeding payload limits. Use glue and screws for structural joints, mount tie-down points with washers or backing plates, and choose hardware with ratings well above the load it will carry. A home-built box will not have a manufacturer’s crash rating, so keep heavy items low, strapped, and away from occupants. Check your owner’s manual before modifying anything near seats, airbags, or fuel systems. If you are unsure, consult a qualified fabricator or your vehicle manufacturer for guidance on safe mounting.
Is a commercial truck bed drawer system worth the money?
It depends on how long you will keep the truck and how you travel. A commercial system like the DECKED unit is built around bed storage for a specific truck. The tradeoff is cost and vehicle-specific fitment, so you must confirm that your model year and bed length match the listing. If you are still discovering your packing needs, a plywood bed box and quality bins cover many of the same functions at a lower price. Many owners find it smart to build a DIY version first, learn what they actually carry, and buy a commercial system later with confidence.
What is the cheapest way to start organizing my vehicle?
Begin with a set of identical stackable bins, a roll of tape for labels, a few ratchet straps, and a seat-back organizer. Sort gear into task-based groups, load the heaviest bin low and forward, and strap everything down. This setup costs very little, works in nearly any vehicle, and reveals your real needs within a couple of trips. Once you know which items you reach for most, add a plywood tray or platform for the gear that deserves a permanent home. Resist buying specialized systems until you have used a basic one for several outings.
Good interior storage comes down to a few principles: know your payload, divide your vehicle into access zones, build in modules, and secure everything that weighs more than a few pounds. Start cheap, learn from real trips, and upgrade only the parts that actually frustrate you. For most budget overlanders, that means bins, one well-built plywood module, and a handful of organizers. Your next step is simple: weigh your current loaded vehicle against the payload sticker, sketch your three access zones on paper, and build one module this weekend. Use it on your next outing, note what works, and improve from there.
If this guide helped, bookmark it for your next build and leave a comment with the storage layout you are planning.